DIY Crate Project
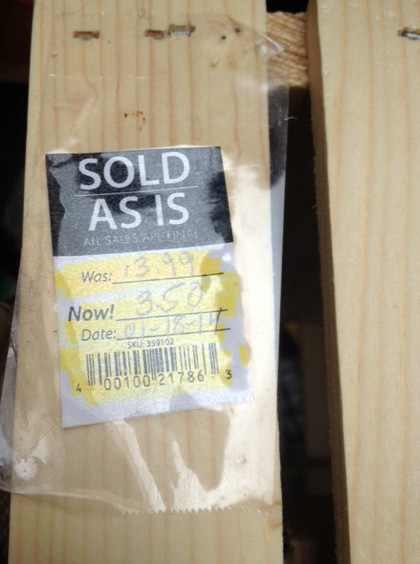
I have a LARGE wish list of furniture and decorative items for the house that I would LOVE to find for a reasonable price. A couple weeks ago I was showing my husband some things I wanted on pinterest and showed him some of the old crate shelves and old crates used as decorations. I found an old decorative crate online for a relatively reasonable price but my husband insisted that I could probably make one for cheaper. I kid you not, the very next day I ran in Michael’s and just happened to walk by a section that I never walk by and there was a damaged crate for sale “as is” for $3.50. I knew they are usually about $10 and the damage was minor where I had to really look to see what was wrong with it. Of course I grabbed it and when I got to the register it rang up for $.50. I about broke out into a happy dance right there in the store. Any of you other frugal shoppers know what that’s like?!? You can’t contain your excitement! I ran home and interrupted the Kentucky basketball game to tell my husband the good news! That’s the kind of good deal that you are excited about for days!
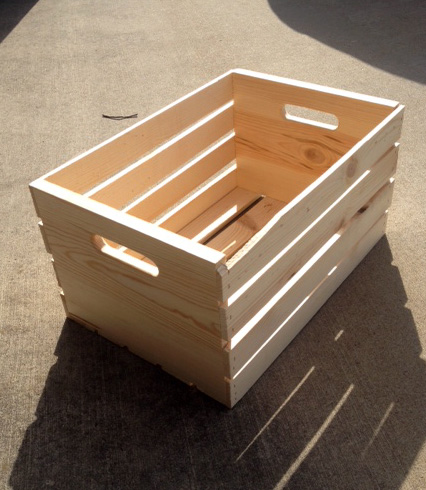
You can kind of see the damage on the front corner but I wanted it to look old so I didn’t care about a that!
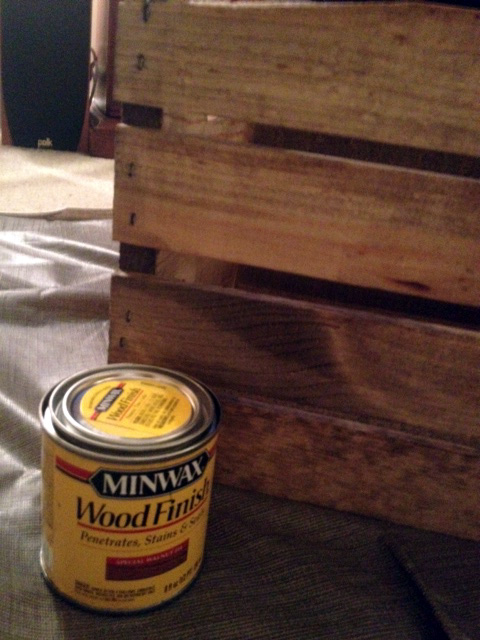
This was my first snow day project and it was super simple and had very few steps. I bought some “special walnut stain” from Lowes for $4.95 and just stained the entire crate with a brush and then wiped it down with an old t-shirt. I used a small brush to get all the edges and cracks and even where the staples are in the wood. Then I left it in the garage to dry.
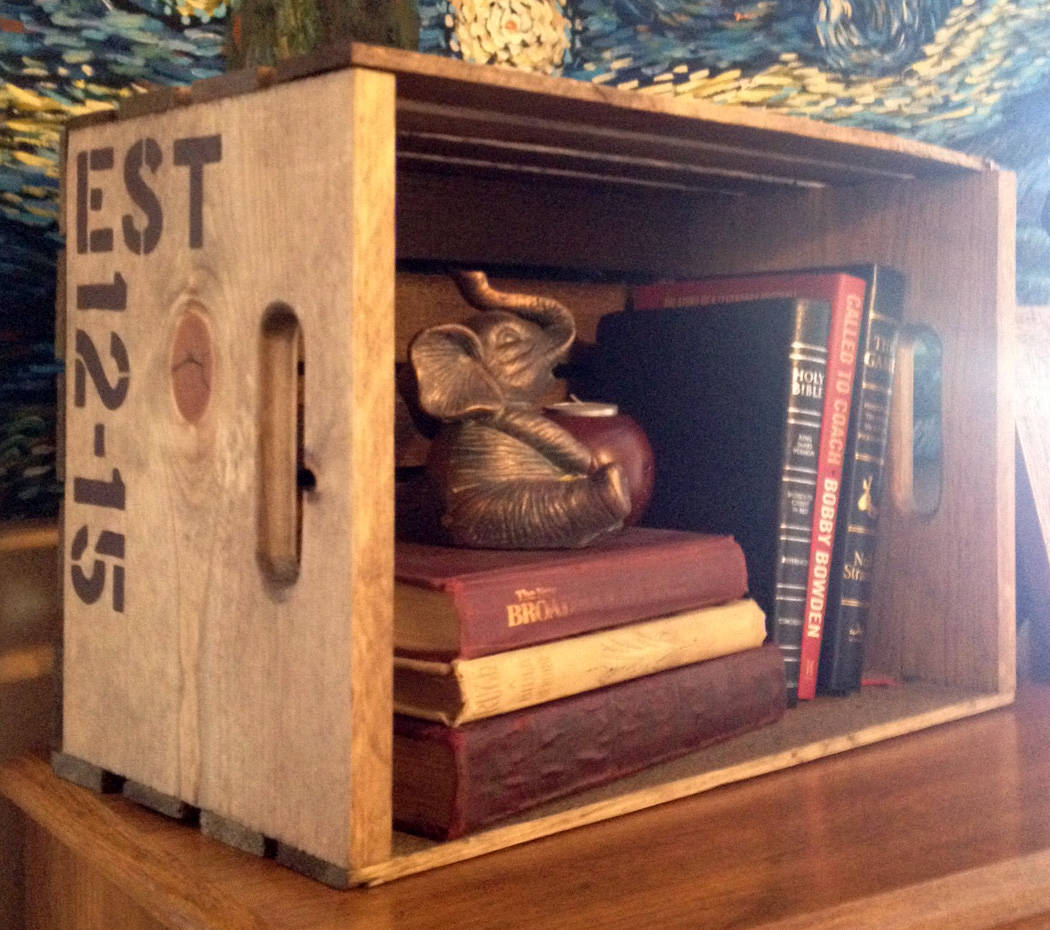
I wanted to add a little detail and add our wedding date on the side of the crate to make it a little unique. I was able to finish the crate on our second snow day. I had purchased some stencils to use but they were too large for the space so I had to free-hand the letters and numbers using a pencil and ruler. It took me a couple tries to get it right since I was pretty much free-handing these but it’s no big deal, I just erased my mistakes!
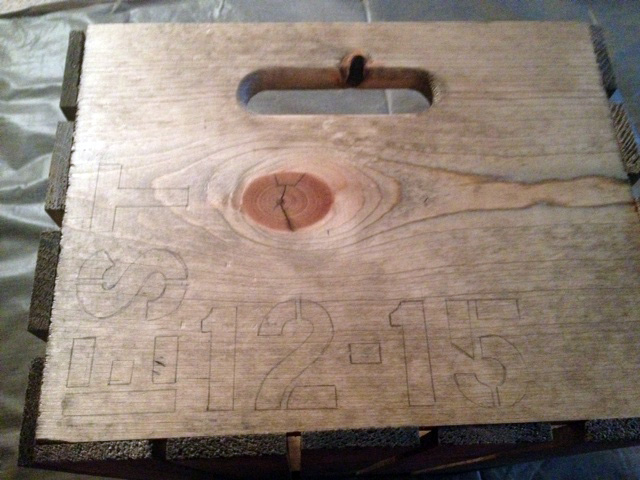
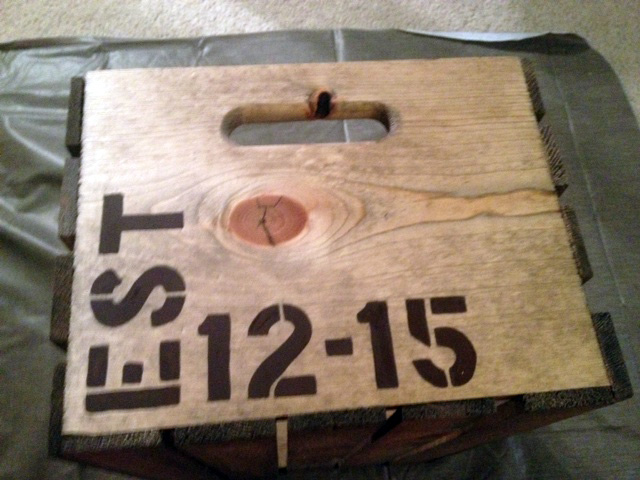
Once I was done drawing the letters and numbers, I used acrylic paint and painted in the stencil I sketched. I let that paint dry and then stained over this one side one more time hoping it would help seal the acrylic.
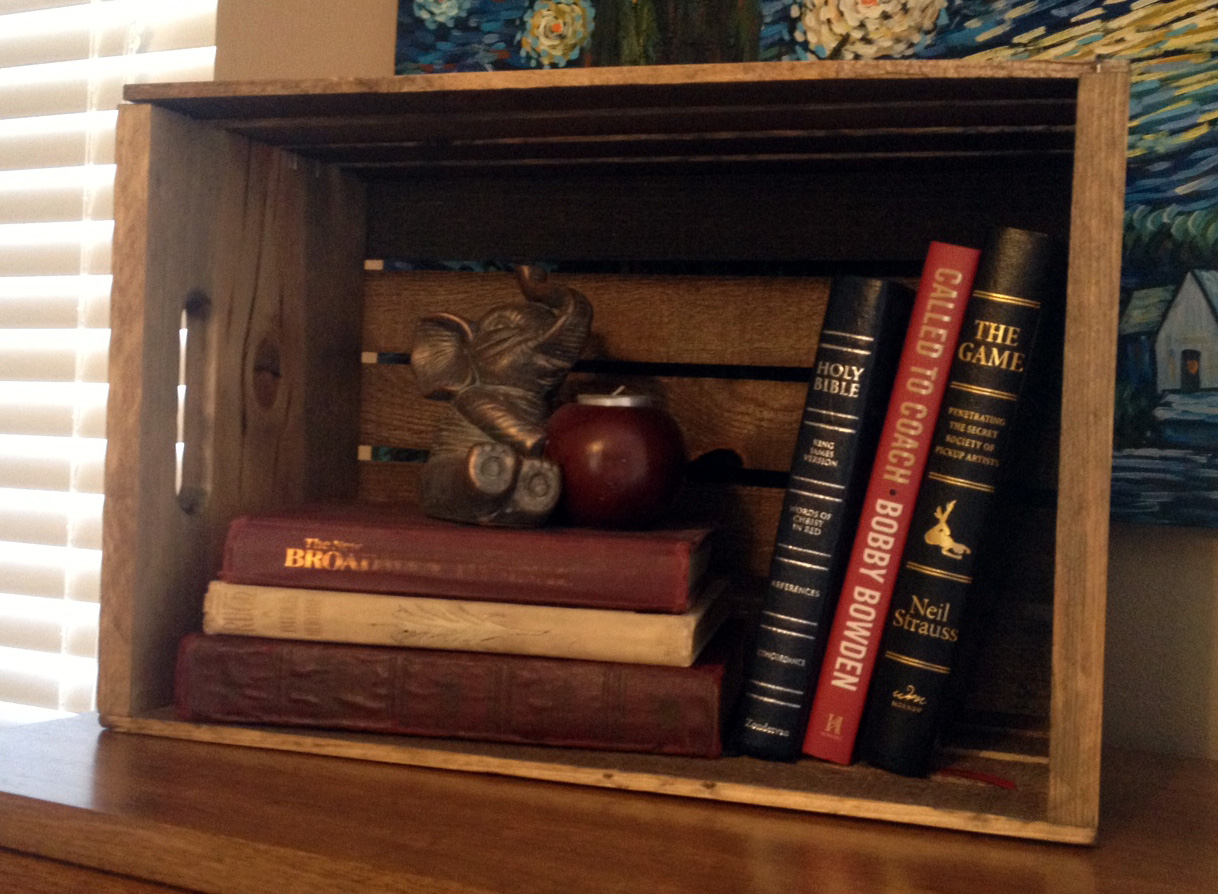
Here is the final product:
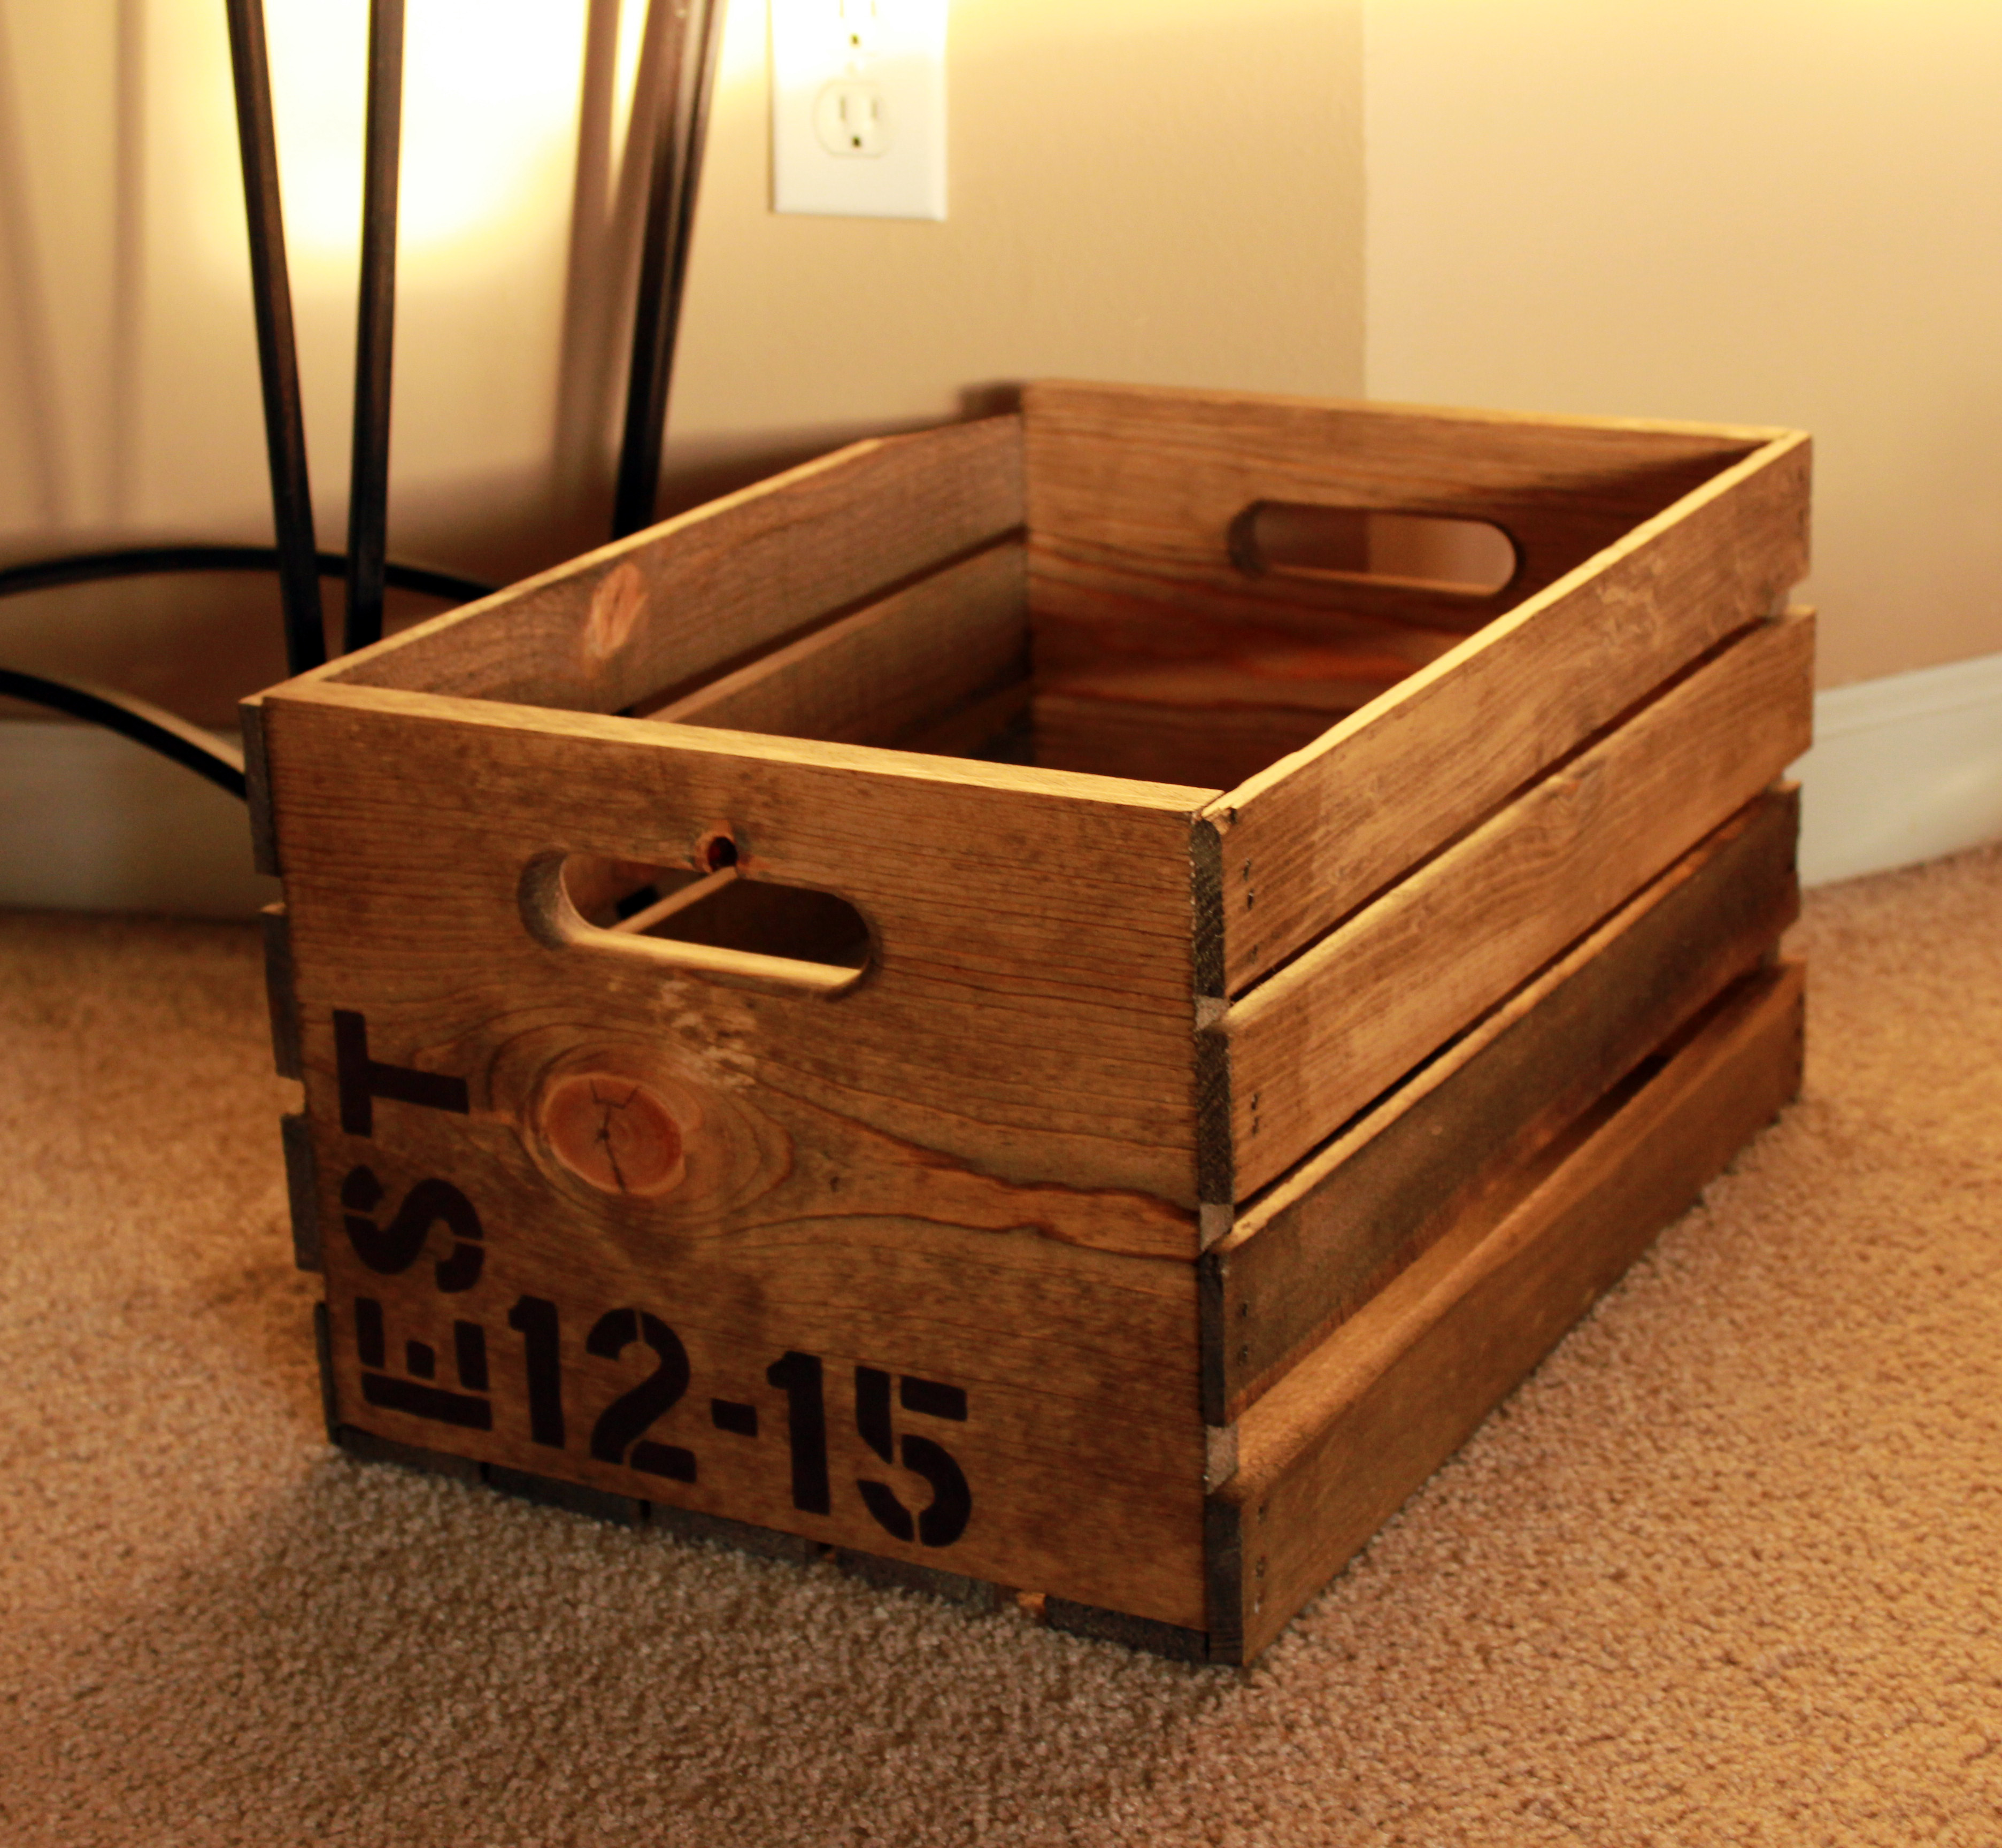
I don’t have a great place to use this for crate right now but I was anxious to use it so I just put it on top of our chest of drawers with some old books and a little ceramic elephant that I had. I’m on the hunt for some more old books because I only have a few and had to use some newer books to fill in for now. So here it is! The lovely DIY antique crate. It cost me about $6 and I still have stain left over for other future projects.