
Tips for Choosing Home Lighting

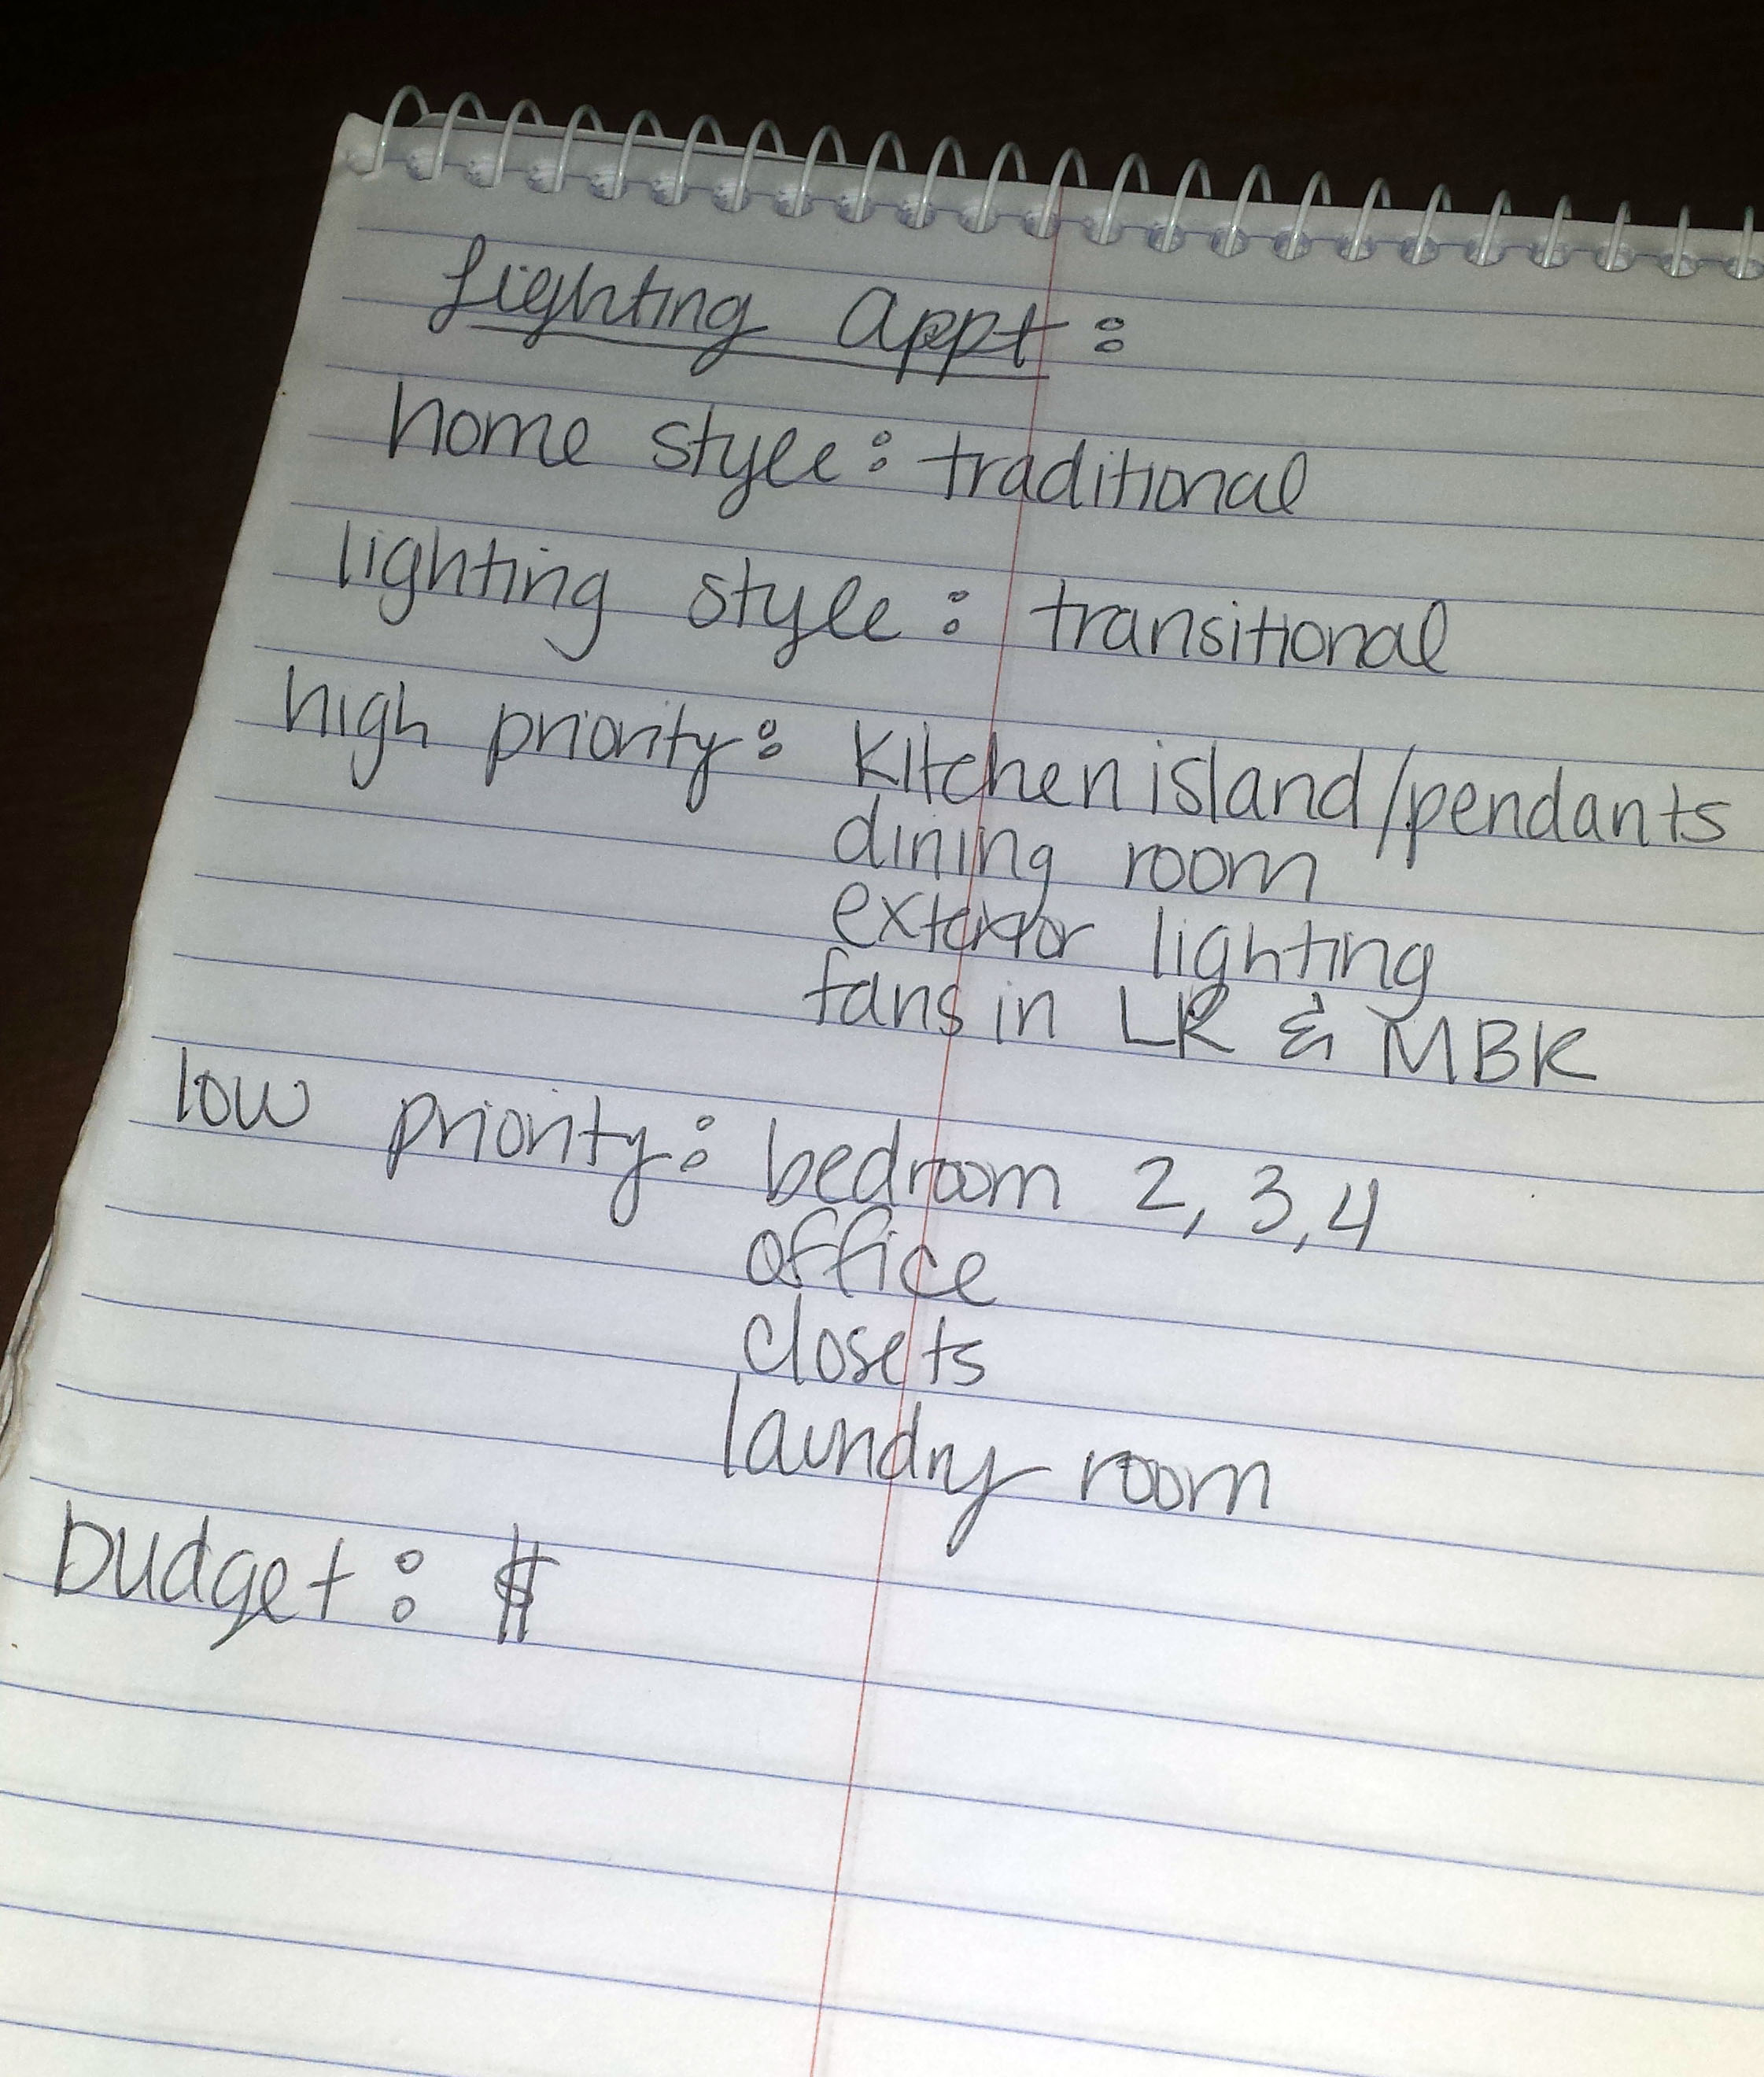
As I mentioned earlier, the style of our new house is traditional and my plan is to add our style with the lighting and decor which would be easy to update in the future if our style changes. We had our lighting appointment this past Saturday and I wanted to be as prepared as possible. I had been looking forward to this appointment since we decided to build, to me lighting can make or break the house! In fact, the lighting is one of the things that really caught my attention in the model home in our subdivision. Our builder uses lots of crown molding and nice hardwoods, granite, cabinets, etc. and I didn’t want to choose dull lighting that might take away from those details.
Here are some tips that helped me prepare:
RESEARCH! (Shocking, I know) As usual I spent a lot of time looking on Pinterest and Houzz at lighting to figure out what I liked. I really liked the lighting in the model home but it wasn’t the style I wanted for the house so I needed to make sure I knew my style well enough to make decisions that worked with the house and were consistent style throughout.
Make a Mood Board! – I’ve made mood boards for many different steps of the building process which I’m sure I’ll post about them soon! I have seen mood boards before but never had a need to make one. Once I had done enough research to find my style and find ideas of lighting I’d love to have, I made lighting mood boards for each room. These are great to show your lighting consultant so they can get a sense of your style and what you’re looking for and can direct you to similar options. It’s always good to have a visual to refer to when you’re choosing other rooms to help coordinate throughout the house.

Prioritize – In a perfect world we would pick out all the perfect light fixtures and fans that we wanted for every room but unfortunately that’s not always possible with budget constraints. We chose our top priority lights that we cared about the most and went cheap/simple everywhere else. Lighting is easy to swap out later so the cheaper fixtures will eventually be changed out when we’re not in the middle of the biggest purchase we have made in our lifetime. For me, the light fixture above the island and pendant lights above the kitchen bar were the most important. Our house has an open floor plan and we will probably spend most of our time in the kitchen and living room where those lights stand out the most. For that reason, we splurged a little on that fixture and got exactly what I wanted and chose to sacrifice a little in other areas.
BUDGET! – Know your budget! Lighting can get really pricey if you are not cautious about your spending. We started out with the rooms we knew we were going cheap and simple with (extra bedrooms, garage, office, etc.) and worked our way up to the more expensive and more important selections. Our consultant calculated where we were within our budget three times during our appointment so we knew how much we still had left to spend and made sure we stayed within the budget. I’m happy to say that even splurging on a couple things we ended up coming in a little under budget which was a WIN for the Hamby’s (that hardly EVER happens and it’s usually the opposite).
One last Tip: Consider how the light fixtures would look when dusty and how to clean them.
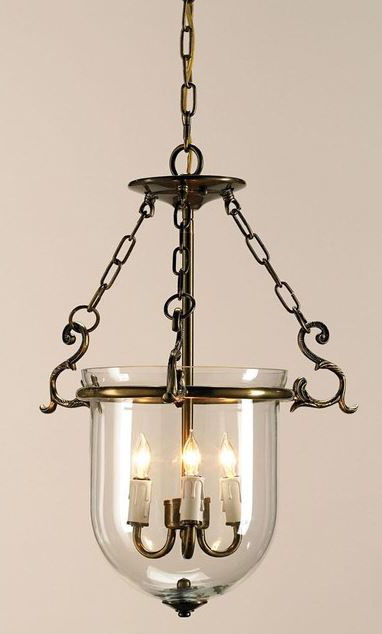 Ex. I love these foyer pendants with glass but after seeing them in the store and how dusty they were, I decided to go with a similar style pendant without the glass bell that would catch and show more dust. I hardly ever think to clean light fixtures and I knew I didn’t need one that I would constantly have to clean. We also chose the seeded glass outdoor lanterns for our exterior which will hide some of the dirt that you can’t avoid with outdoor lighting.
I hope you found these tips helpful! I am by no means an expert but just sharing some things that have helped us throughout this process!