
$10 Sponge Accent Wall
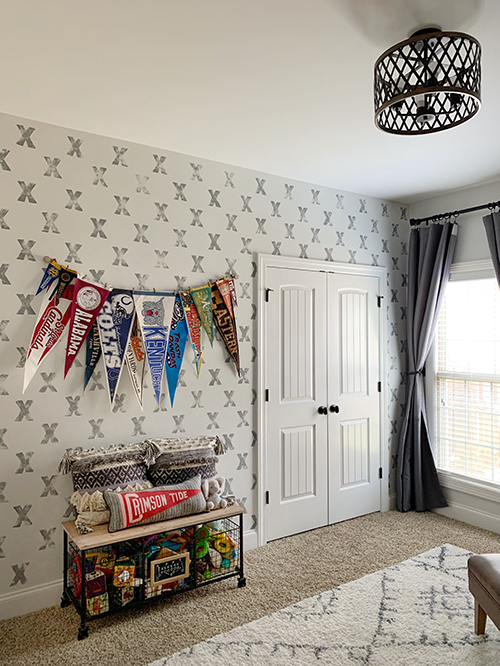
This bedroom has always felt dark. It only has one window and I totally regret not adding a second one when we built (the next house we build I will not make that mistake again). So when I was transforming it into a nursery I painted 3 of the walls white to brighten up the room a bit which definitely helped. I love the white but this one wall was fairly large and just felt a little too plain and like it was missing something, cue a good DIY.
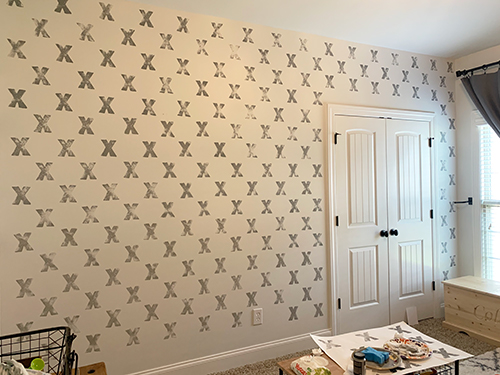
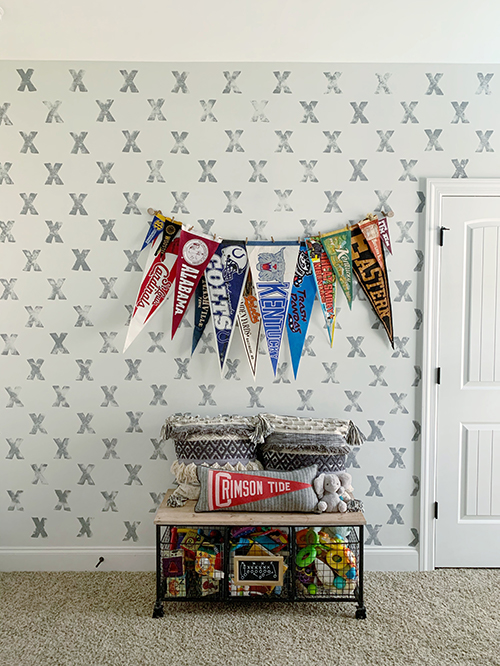
I keep seeing the sponge accent walls popping up all over Instagram and love the idea of them and seeing everyones creative designs using them. It’s such a cheap and easy way to give a wall some character. This got my wheels turning, what pattern or shape could I do in here to give this wall an update? With a football themed room, I started thinking maybe X’s and O’s like you see in football plays. I decided to keep it simple and go with just X’s and here is how easy this DIY really is!!
- Supplies:
- Car Wash Sponge – you could use a normal rectangular sponge as well
- Scissors
- Sharpie (optional)
- Poster board (optional)
- Paper Plates
- Craft Paint – I used this is Silver Gray (You can really use any paint you have on hand)
- Painters Tape
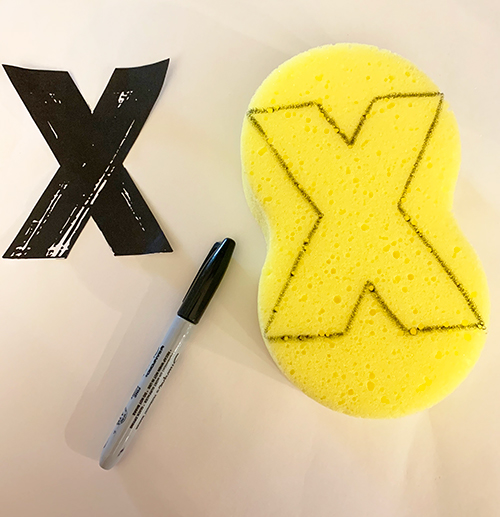
When this idea came to me, I started by photoshopping some X’s on that wall to get an idea of what it would look like to make sure I liked it. So when I decided to go for it, I went ahead and used that font since I knew I liked the shape/width of that X. So I printed it out and used that as a guide to draw my X on my sponge. And then cut my sponge from there.
I started by practicing on a poster board which is totally optional. I wanted to test the sponge and get an idea for how much or little paint was needed and how much pressure to apply. I do recommend doing this so you can get your technique down before you start on the wall. I also used it to try out spacing which helped as I used it as a guide for the wall.
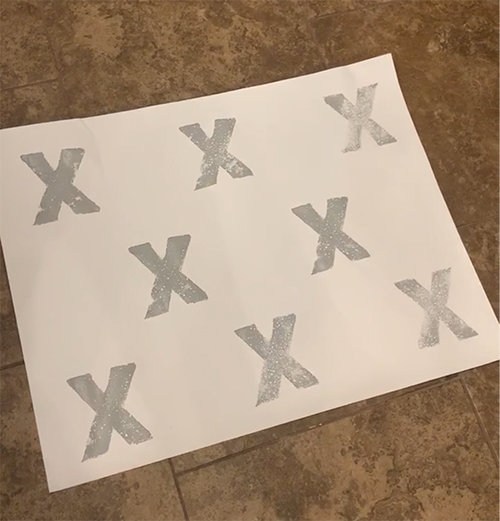
I shared all of this in my Instagram stories when I did it and got lots of questions about did I measure? The answer is not exactly. I did cut a piece of cardstock to be the distance between two X’s on my poster and used that on my top row only. After that top row I just eyeballed the rest between the two X’s above.
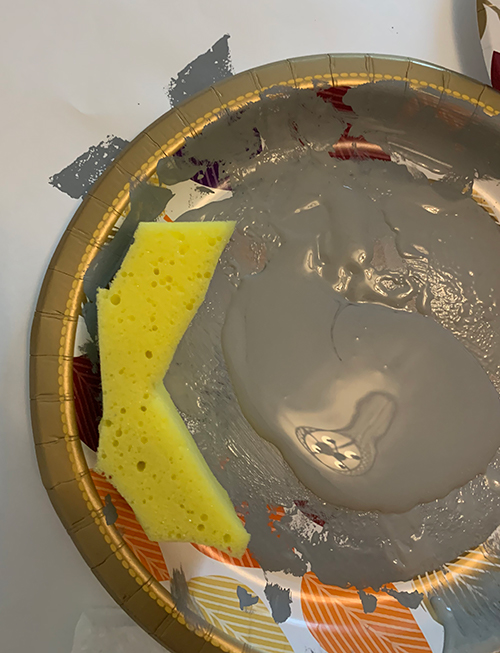
I used two paper plates to do this, one with a small amount of paint on it to load up my sponge and another with a paper towel on it to dab and blot the paint off so I didn’t have too much paint that would run on the wall. I could usually get about 4-5 X’s with on loading of paint but would just start increasing pressure towards the last couple. You will get varying shades of coverage but that’s what makes it look so neat! I did keep a baby wipe on me for any runs or accidents that I needed to quickly wipe up.
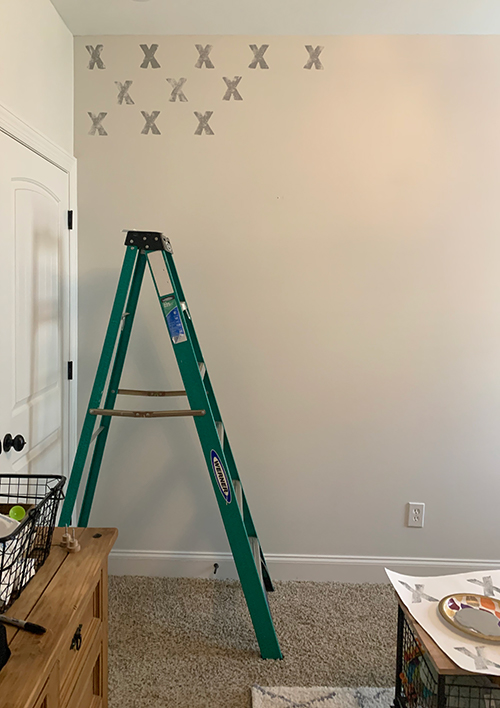
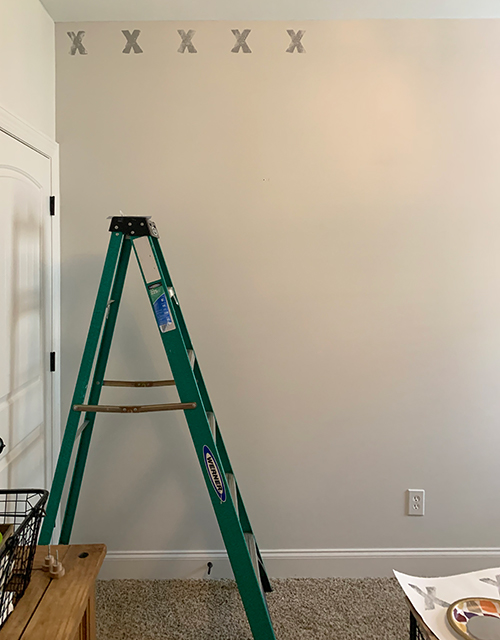
It worked best to work in small sections that I had good access to on my ladder. When I started reaching too far I couldn’t see as great and my X’s were a bit crooked. I just worked my way over and then down and did all the full X’s first which left the ones that needed to be partial X’s along the corners and closet.
I created a second sponge since I had bought a 4 pack of the sponges but you can always just cut your first one down as needed after doing all the full X’s. I got lucky and just had to cut my sponge right in half to use on all my corners and edges of the closet. I do recommend taping off because it’s hard to keep the sponges from being messy and getting paint on the connecting walls or closet trim.

But that was all! $10 worth of supplies (sponges, paint and a poster) and just about an hour and a half (may would have been less but I had distractions and was taking videos and pictures in between) so it was a really quick and cheap DIY project which are always my favorite kind 😉
You can look up other sponge accent walls and see all kinds of patterns and shapes that people have used and cut their sponges into!