Children’s Table and Chairs Makeover
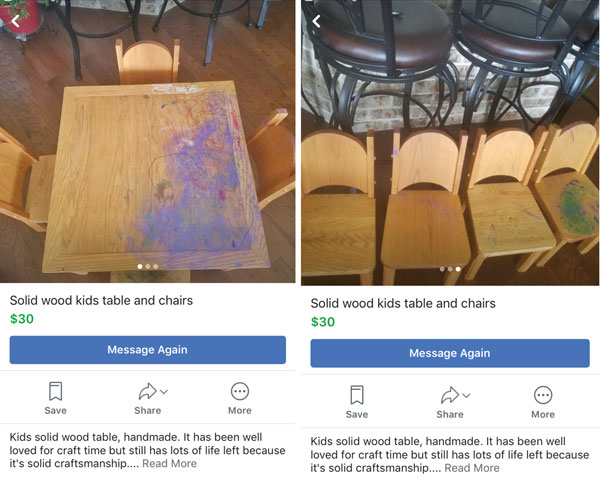
Last fall I was on the hunt for a children’s table and chair set. I knew I wanted something that was made of real wood and was quality made but I didn’t want to spend a lot. After checking flea markets and consistently checking Facebook marketplace, I found this set on facebook for $30. It was covered in marker, paint, stickers, etc but it fit all my requirements (real wood, handmade, affordable – SOLD).
We used it for months as is but finally this spring I decided it was time to give it the love it deserved. As much as I wanted to sand it down and restain it, that was more work and time than I had to give it… so painting it is!
Here are the supplies I used:
Country Chic Chalk Paint – Color Harmony
Palm/Hand Sander
Makeover:
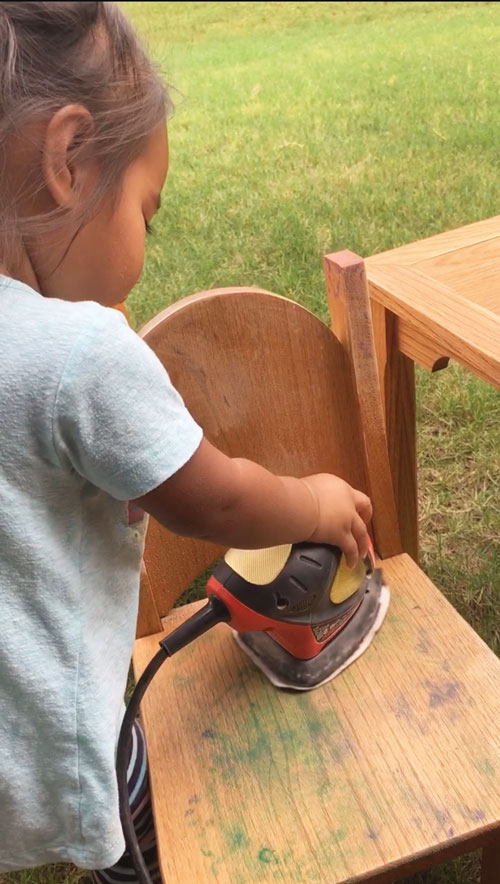
I started by giving it a good sanding. I made sure to get all the stickers, raised paint splatters, etc. Anything that would prevent it from being a smooth painted surface got sanded off. Ellie even helped a little 😉
Now it was time for painting. My original plan was to just paint it all white but I had this lighter beige chalk paint I was given years ago and never used and last minute decided to use that also.
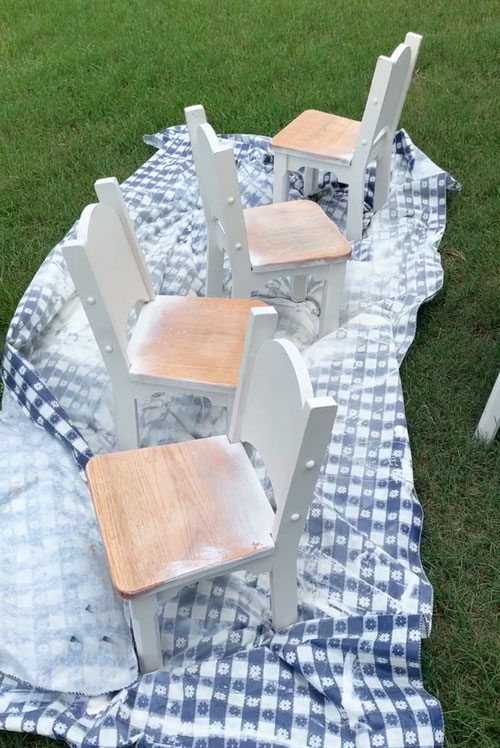
So I started with all of the legs/body of the table and chairs. I started painting by hand but quickly realized I’m too impatient for that and swapped over to Chalk Spray Paint instead which saved me a lot of time! Because of the amount of product spray paint uses, it probably does increase the cost a little but I already had one can on hand and it was worth the price to speed things along!
One tip I have found for chalk paint and especially when spraying is to lightly sand by hand between each coat. This is just to ensure you have a good smooth finish which to me is a must! That’s one thing I always struggled with when it came to painted furniture, it never felt smooth and this quick step helps a ton!
After I had all the legs and body of the table and legs and back of the chairs fully covered, I distressed them a bit on the edges using my palm sander because Lord knows my painting isn’t perfect and that makes it seem more intentional 😉 Then I sanded these seats down again just to make sure my spray paint mess didn’t affect the smoothness of the painted seats!
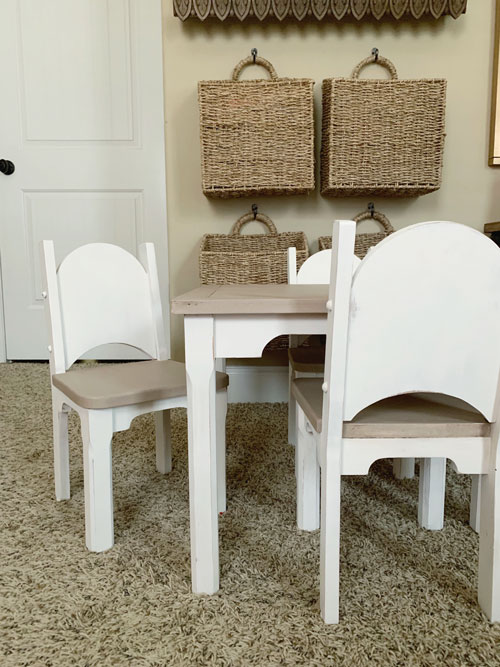
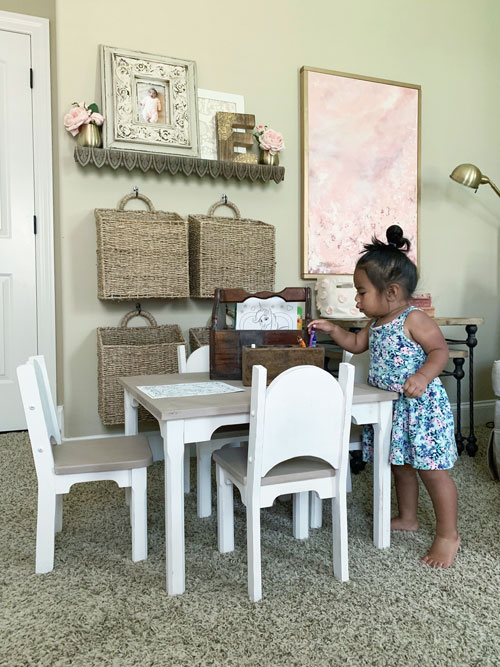
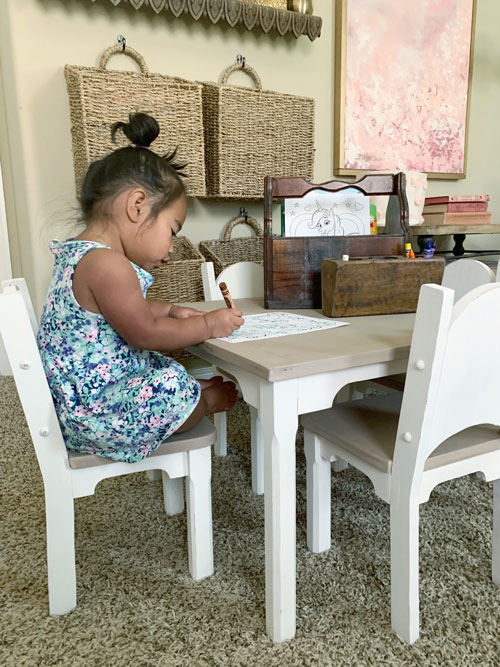
Then I hand painted the seats and top with the darker color. I really feel like the two toned is what made this makeover! Although I would have rather had stained, this was the next best option and was so much easier!
I had some dark wax from a project years ago and although it wasn’t necessary it really richened and warmed up the color of the top and seats!
I did end up sealing the top with two coats using this top coat that came highly recommended! I knew it was going to be colored on (which it was the very first use) and eaten on at times so I wanted to be able to clean it easily without having to refresh the table top paint too often! The great news is if it starts looking dingy, I can just refresh with a quick coat of paint!
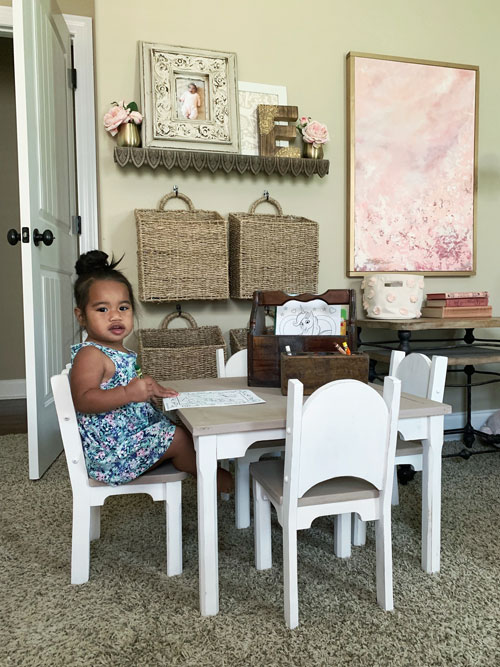
I love how it turned out! It’s really was an easy makeover and didn’t take much time, just a little labor of love! Luckily I had several of the supplies already on hand which kept my cost down but I still think it would be worth the cost of materials to have a set that is a nice quality piece that will last and also is one of kind! <3
This post contains affiliate links and I may receive commissions for the purchase made through this link at no extra cost to you.