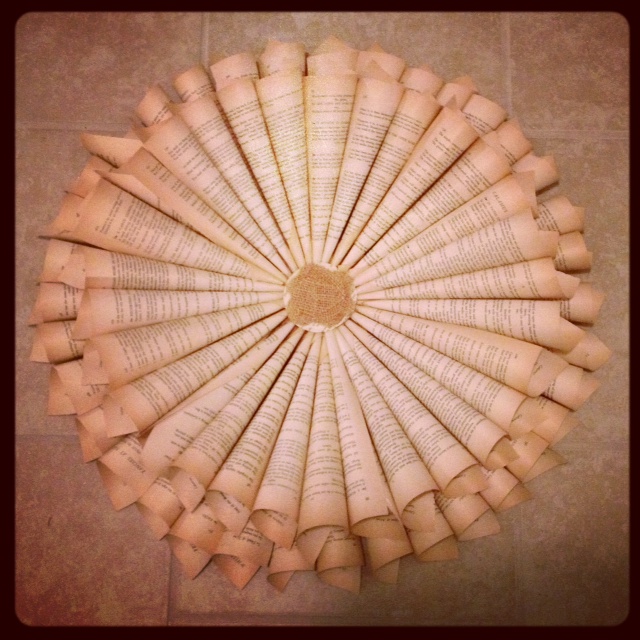
DIY Book Wreath
The days are getting shorter and it’s now starting to get cooler here in Alabama (although right now it’s back to 80 degrees). Bryant and I decided to have a movie night Friday night and I figured I’d do one of the many crafts I’ve had on my to-do list. We watched World War Z and drank coffee/hot chocolate and I worked on a craft project. I’ve had my heart set on making a book page wreath for a while and especially since I found those old windows. I looked at a couple thrift stores but never could find a book that had pages that were a little yellowed and worn looking. I went to our local library and purchased an old book in their book sale for $1. I picked out a book that was about 5×7 inches because I didn’t want the pages too small or too large for the wreath.
I glanced at many different tutorials to find the right style of book wreath and find a tutorial that broke the steps down enough to make it easy! I ended up using this tutorial on the Vintage Violet blog. I’m not going to break down every single step since you can follow her steps but I did photograph the main steps.
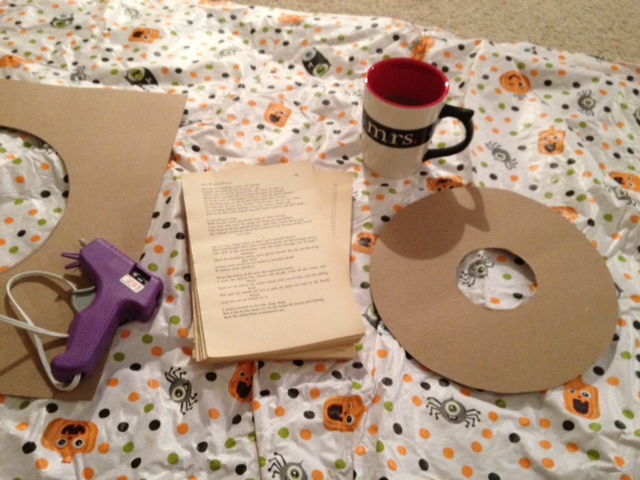
Things you will need:
- Cardboard
- Scissors
- Hot glue gun
- Book Pages
- Hot chocolate (optional but recommended) 🙂
I used a vinyl tablecloth to protect my carpet from the hot glue which made for busy/messy pictures so I apologize ahead of time!
Step 1: Find a thin piece of cardboard to use as the base for the wreath. I used different size bowls to trace the size I wanted as the base and cut out the center hole
Step 2: Remove all the book pages. They recommend using an exacto knife but I was able to pull mine off easily without ripping the pages.
Step 3: Once you have all your supplies, start making cones! You just start wrapping and glue the edge. You can view the Vintage Violet tutorial for more information. It took me several tries to figure out how to get the cones to look the way I wanted. I liked the tighter wrapped cones. You’ll see what I mean when you start! I used about 70 cones so this will take you a while!
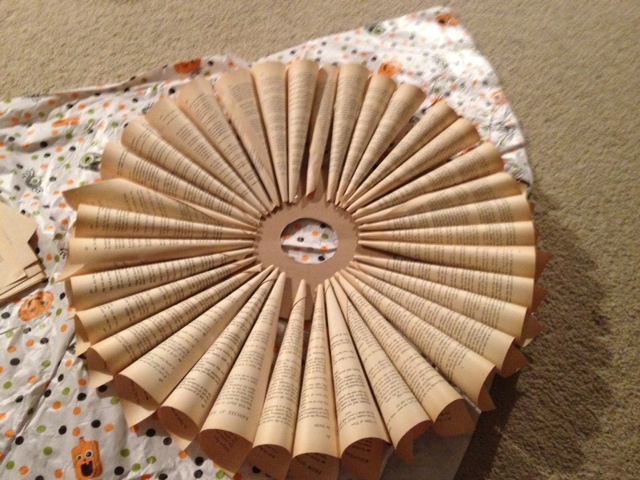
Step 4: Once you have all your cones made: Start gluing them onto the cardboard circle. You’ll want to glue them on the outside half of the circle leaving some cardboard on the inside to glue the second layer to. I tried to place the cones all in the same direction to keep them consistent (notice the little points on the larger side of the cone are all on the bottom for the most part).
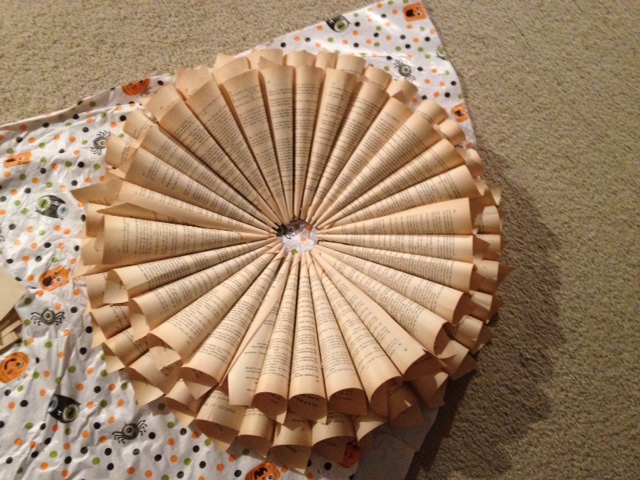
Step 5: Glue the next layer of cones on top of the first layer. I put glue on the cardboard and also a line on the bottom book page that it would sit on top of to secure that layer nicely. You will find that towards the end of the circle it will be harder to fit the cones so you’ll have to be creative to squeeze them in there.
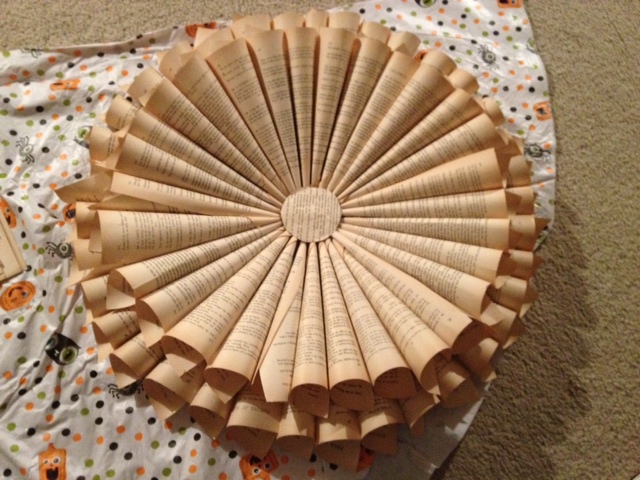
This is perfectly acceptable as a finished product! Some people add a third layer (although I didn’t have enough room – you would have needed a bigger cardboard base). Many people hang them just like this (like Sarah did in the tutorial). I didn’t care for the negative space in the middle so I used the cardboard circle I had cut out from my cardboard base and glued a book page on top of that and glued it to the middle of the wreath.
I would have been perfectly happy with my wreath like this but I went ahead and made a little burlap looking flower to place on top of that center piece. I just cut several circles of burlap and layered them to look flower-ish. I am very happy with my first attempt at a book page wreath and you can’t beat $1! You’ll notice there are some cones that aren’t turned just perfectly so that is something I would want to improve on my next book wreath. I think I’ll hang it on one of the old windows and put it out once Halloween is over! I’ll post pictures once I’ve got it out!
This project was pretty time consuming so make sure you are prepared to spend at least two hours wrapping and gluing although World War Z may have distracted me a bit! 🙂

