
DIY Wood Paneled Accent Wall
I’ve come to the conclusion that being a “boy mom” just doesn’t come natural to me…YET! Ellie’s room all came together with such ease (which is ironic now because I didn’t know the gender and it feels very feminine) but when we found out we were expecting a boy, my imagination seemed to be failing me. We couldn’t seem to pick a name, I wasn’t excited about any nursery ideas, and I had the hardest time finding any boy clothes that I liked.
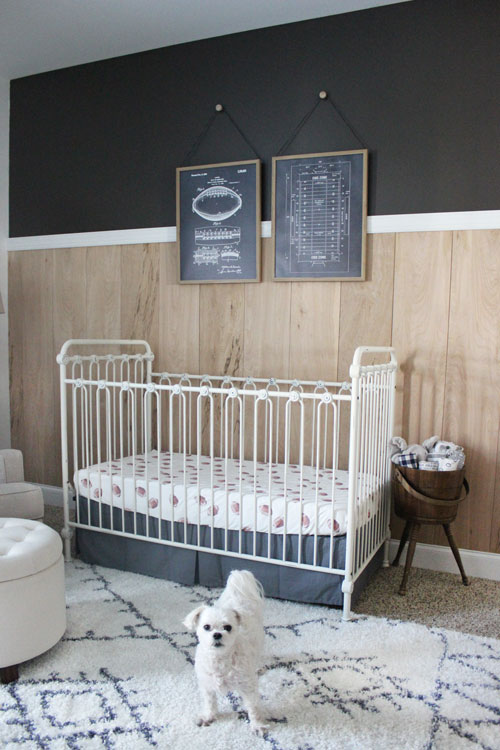
Of course I knew I wanted to do something special for his room and something more boy-ish even though we were using the same crib and furniture from Ellie’s room. I had narrowed it down to wanting an accent wall with unfinished wood…that just felt perfect for a little boys nursery to me. I spent hours searching for unfinished wood accent walls and surprisingly couldn’t find a single one that was what I had in mind. Everything I was finding was more rustic than I had in mind (mostly all pallet/barnwood walls).
So after I finally had a game plan to try, I was ready to get started and thought I’d share how I did it – since I haven’t been able to find this anywhere online!
- Measure the wall and do some math to figure out how much wood you need and what size you need the wood cut down to.
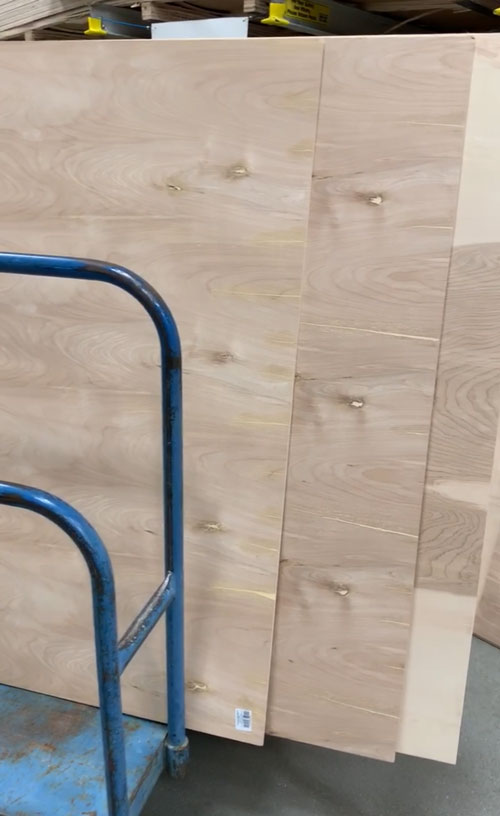
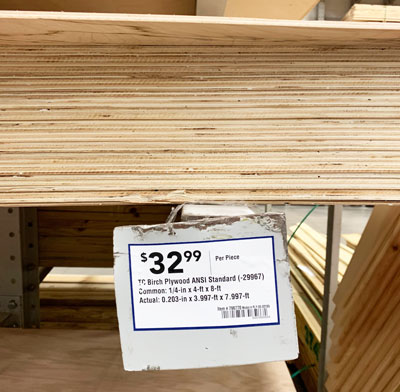
So I measured the wall, did a little math and headed to Lowes to pick out some wood. I needed exactly 3 sheets of plywood (4×8). I decided to use birch plywood. I like the wood tones and wood grain and it was thin enough and affordable enough to be perfect for what I had in mind. The guys at Lowes were super helpful and literally helped me get every single piece of plywood down to pick out the best ones. God Bless ‘em. That is one major tip, you want to pick out sheets that “match” or “coordinate” with one another. I found two that were perfect together but for the third I had to settle for one that had different wood graining but still worked with the others. Hindsight I really like the sporadic dark wood grain so that was a happy accident that wouldn’t have happened had they had a third sheet like my first two!
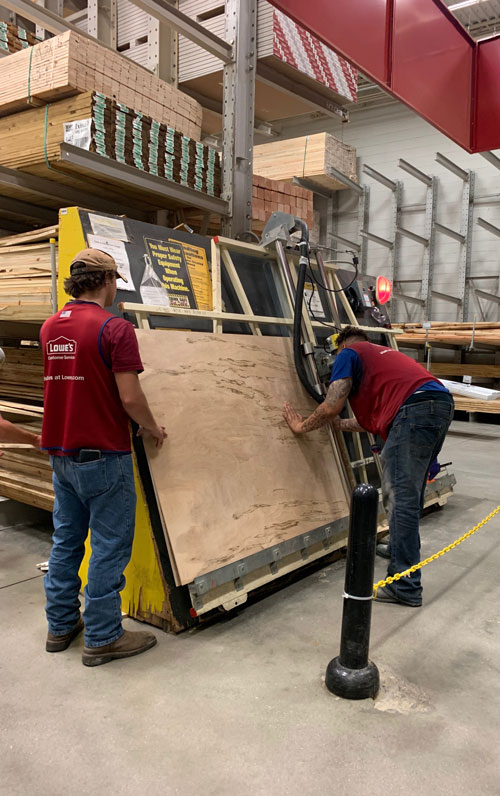
- I had them cut the plywood sheets down to the size I needed.
I wanted this wall to go about ⅔ of the way up so I had them cut down to 10 inches x 5 ft. It’s over 5 foot tall since its sitting on the baseboards, just fyi! Once again – the guys at Lowes were so helpful and happy to help! I don’t have a table saw so this project wouldn’t have happened without their help!
- Sand/Smooth the Edges of the Board
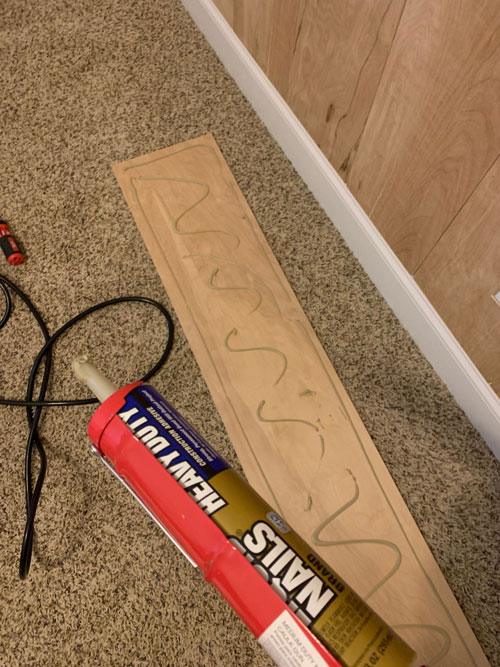
Unfortunately these splintered pretty good when being cut so I just took my palm sander and ran it along all 4 sides and the top of the edges to make sure they were smooth and nobody will be getting any splinters during installation or after 🙂
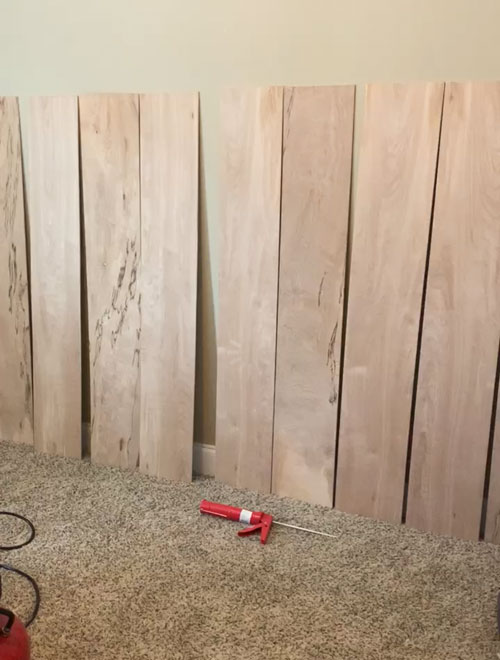
- Lay out your boards in your space and find the best arrangement
Don’t skip this step! I played around with my layout for a good 10-15 minutes to make sure there were no patterns or weird areas that stuck out too much. I wanted to make sure the pieces with the dark grain were mixed throughout the wall and not all in one area. I also noticed too many of the boards had knots along the top in the same exact spot which seemed too uniform so I flipped those upside down to break up any of those consistencies.
- Start Applying! First with Liquid Nails and then securing it with a nail gun
I started by finding the center of the wall and centering the middle board and working my way out. I knew I wouldn’t have an exact fit for 10 inch boards so this meant I’d have two smaller boards on each side which looks much better than having one odd board width on one side only. I lined the back of the board with liquid nails and then secured it in place with a nail gun. Then I just kept repeating this step for each board and using nickels as spacers in between each board.
- Tweak the special pieces
I mentioned before that I knew the two outside pieces would be smaller but I didn’t want to do the math prior to installation because HELLO USER ERROR (for me I knew that would be with math and installation). So once I got to that last piece I measured and went back to Lowes and they cut down my outside pieces to the size needed! We also had to cut around one outlet which I recruited my husband to help with. We measured how far from the bottom and side and then traced the outlet cover to give us the line to cut with the jigsaw. This plywood splinters alot and was difficult to cut with the jigsaw so it isn’t perfect but it’ll be behind a crib and you really don’t notice unless you’re up close.

- Paint the top of the wall
You really could do this step anytime. You could do it before the wood planking or even after the trim but I hadn’t picked my color prior to the wood planking and I didn’t want to have to tape off or be careful around the trim piece so it made sense for me to to do it after the planking! I painted 3 coats to be safe.
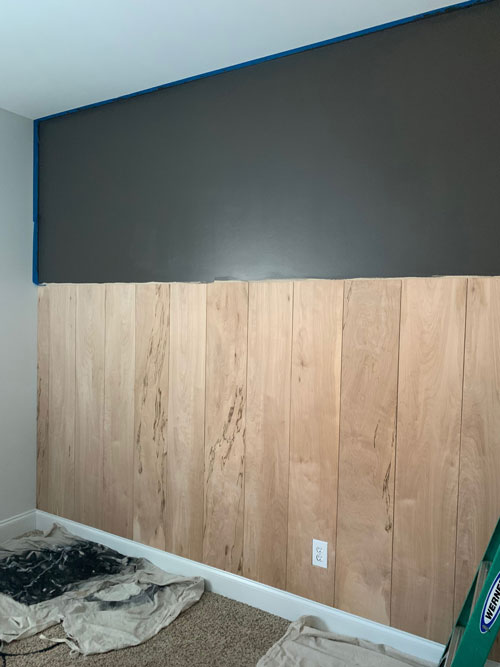
- Add Middle Trim Piece.
Since I already had white baseboards I thought it needed some white trim to finish it off. I bought a 12 ft piece and cut it to the exact size and then secured it right over the top of the top of the wood pieces. Between the room possibly not being level or the boards not being perfect, there was some varying heights of the wood pieces by just a 1/16th of an inch or so. So I just made sure the bottom of the trim covered all of that so you’ll never know! I used liquid nails and a nail gun to secure this to the wall!
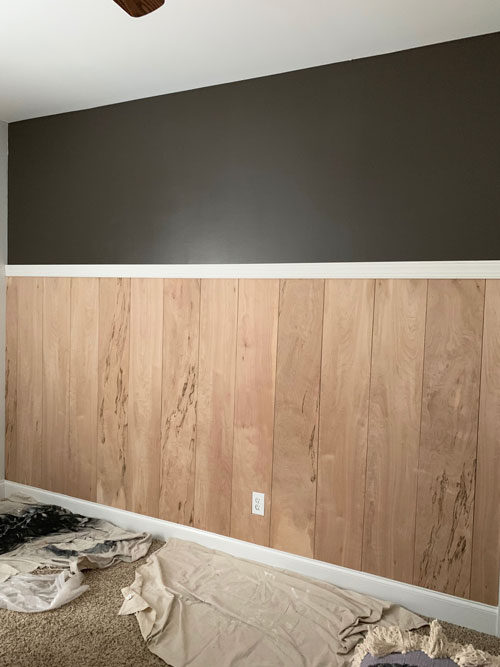
- Putty and Finishing Touches
Then all I needed to do was to putty nail holes. I decided to leave the wood nail holes as is for now but I did putty the trim piece. Then I painted the trim to give a good finish and touched up any areas that my painting got a little crazy!
That was all! It really was a super easy DIY accent wall and worked out perfectly for our Vintage Football Nursery!
Here is the rounded up cost breakdown for all of you interested:
3 sheets of plywood = $100
2.5 cans of liquid nails = $10
Trim Piece = $15
Paint = $15
So the estimated total of this accent wall is $140