Breakfast Table Makeover
I’m going to admit something with you all, when it comes to furniture my husband and I can be a little snobby (especially my husband – sorry honey). We’re at a place in our life where we’re slowly replacing our old things with new and quality pieces that we love and are willing to pay more for. That being said, I think there is a certain time and place for those quality pieces.
Back Story!
You can skip down a bit if you’re here just for the makeover info! 🙂
I recently realized we really needed a breakfast table ASAP. Ellie was over the high chair life and I wanted a place where we could sit and eat as a family in the living room (where we spend most of our time). Normally, we would start hunting for the perfect table that we loved and could see ourselves using for 10+ years… but the truth is our life isn’t ready for that quality piece right now. I wanted something quality but something I didn’t have to worry over. With a toddler, a baby on the way and local nieces and nephews, I wanted something that was the style I wanted and a quality real wood piece but without the burden of the cost. So I did what any practical woman would do, I started on the hunt on facebook marketplace. 🙂
My Must Haves: real wood, quality made, could seat at least 6, affordable
Style: traditional in style
Bonus Wish List: storage drawers (I just think these add character and are a nice addition so this was on the bonus wishlist)
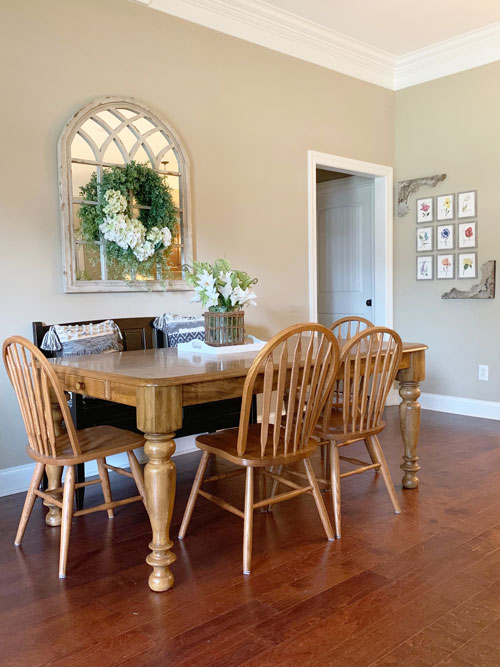
It took several weeks of hunting but this one came along and checked all of those boxes. It even had the storage drawers and a leaf which meant it could seat 8 or more if needed which may come in handy when we have family or friends over so that was an extra bonus. It was $150 and is SUPER heavy which is just a sign of a quality made piece. SOLD to the Hamby’s for $150 😉
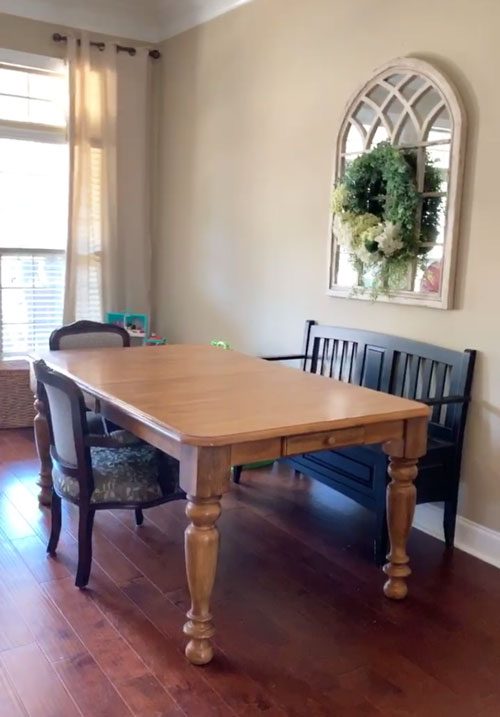
Next up, I needed chairs. Once again I knew I wanted something traditional, easy to clean (no wicker bottoms that would easily trap food, play dough, etc.) and CHEAP! I looked for weeks on FB marketplace and then decided to try some thrift stores. One day I popped in one and they had a table and 6 chairs set for $50 which I knew was a great deal for the chairs alone. I asked if they would sell me the chairs separate and somehow walked out with 6 chairs for $29! A STEAL!
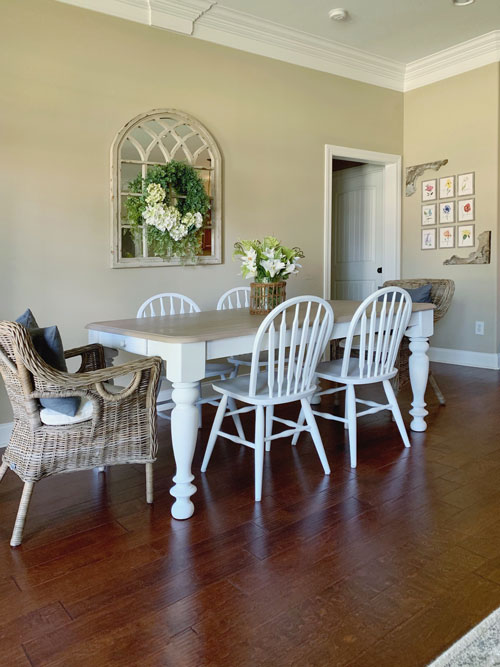
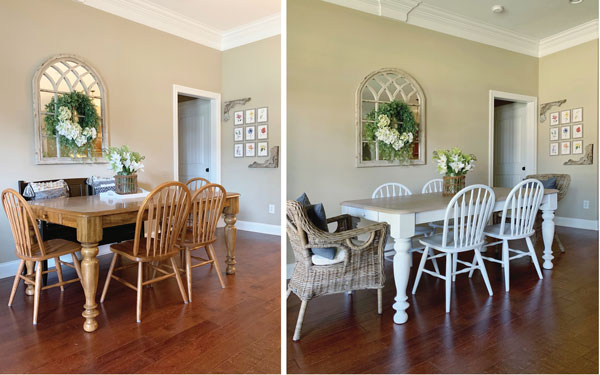
So here we are, we have exactly what I wanted for under $180 and we used it as is for 5 months or so and it’s been perfect…other than the wood tone just wasn’t working with our floors and other decor. So after I completed the children’s table makeover I shared HERE>> it inspired me to do the same with our breakfast table and chairs!
MAKEOVER INFO:
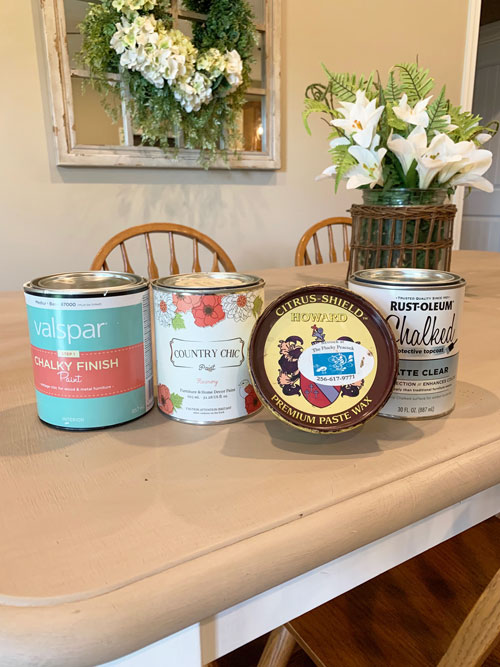
Here are the supplies I used:
White Chalk Paint – this is made to be tinted but I just used it as is!
Country Chic Chalk Paint – Color Harmony
Prep Info: I cleaned the table real good but other than that I did ZERO PREP! The joy of chalk paint!
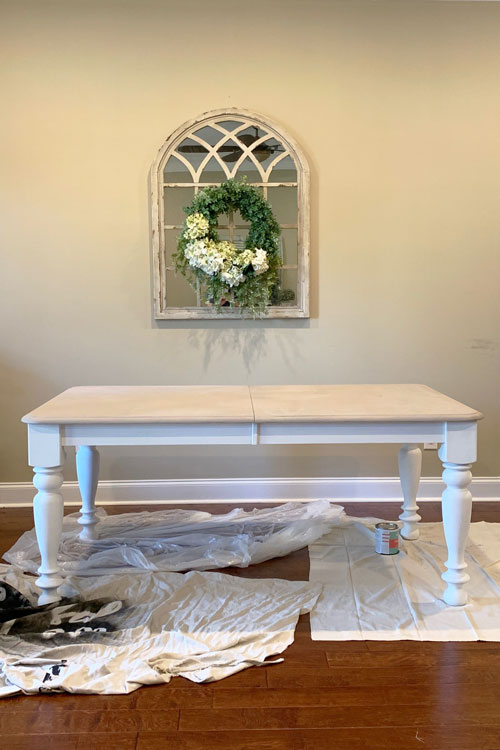
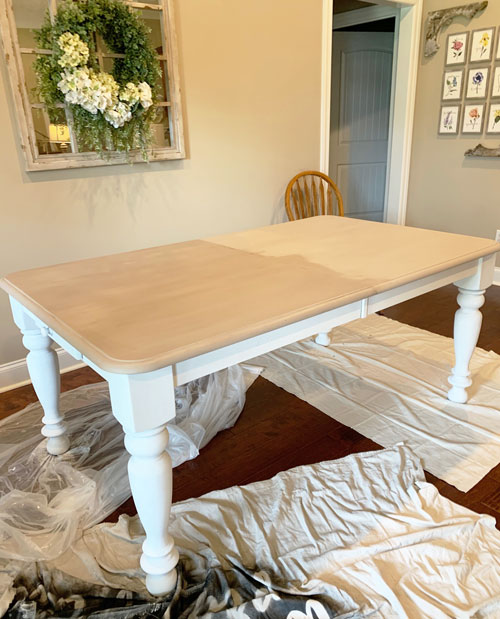
I started with painting the legs and body. This table is super heavy and I didn’t want to have to move it outside to work on it so chalk paint was the way to go for me since it doesn’t have fumes.
My friend Kendra from Momtique is an amazing furniture painter and told me that round brushes are better for preventing brush strokes so I picked this one up at Lowes and it worked great.
It did take about 5 coats of the white to get full coverage but luckily chalk paint dries super fast so you don’t have to wait much time in between coats! One thing I did is after two coats painting side to side, I painted the next two coats up and down. This helped get better coverage and cover up any brush strokes that may be showing!
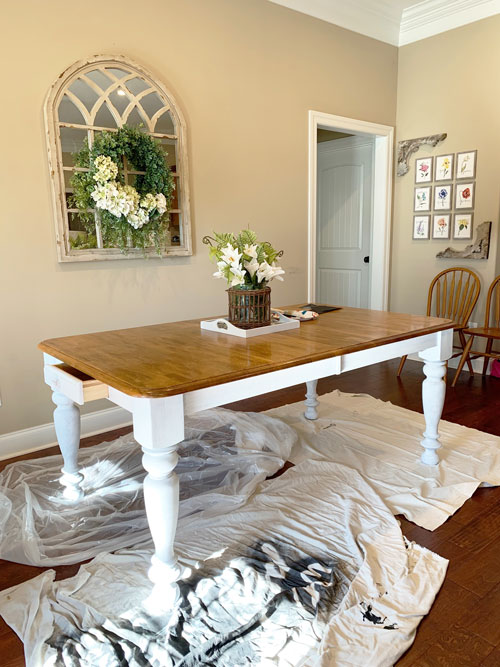
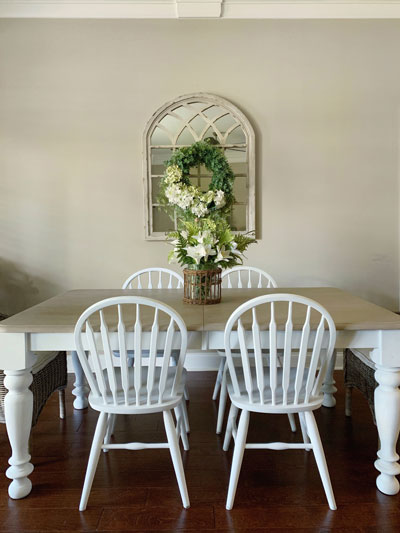
Then I painted the top using the Country Chic Chalk Paint. It took about 3 coats to get the coverage I wanted.
Here is just a picture to show you with the dark wax and without. It’s not necessary but it did give the top the richer warmth that I wanted!
Once it was waxed and it had enough time to “dry/cure”, I sealed it with this top coat that was recommended to me on Instagram! It was easy to apply and so far I’ve been happy with it. It wasn’t as matte as I would have preferred but it was easy to use and I knew it needed to be sealed really well since I have a messy eater (Ellie) and it gets wiped down daily!
Then I just painted the chairs white! I primed them with regular white spray paint I had on hand but it still took 2-3 coats of brushing on the chalk paint to get the full coverage that I wanted. I sealed them with this clear wax. I have to admit that I didn’t love how this wax went on, it was stickier than I imagined. I’ve never used clear wax so I can’t compare it to others but it was just what I could pick up quickly at Lowes. I plan to go back and clear wax the legs of the table just to get it a protective coat so it will hold up over time!
Eventually I will paint the last two chairs but for now I wanted to use these wicker chairs I have from Birch Lane which I thought worked perfectly to bring out that grey-ish brown tones from the corbels on the wall.