Easy Bathroom Revamp
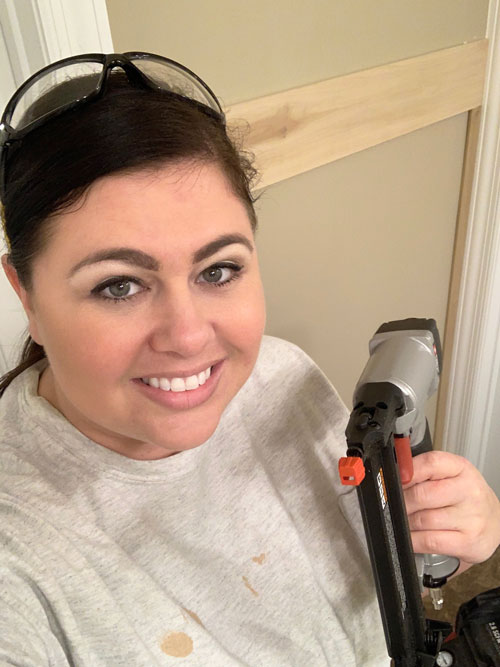
When I’m scrolling Instagram or Pinterest I always see these gorgeous bathrooms that just have that wow factor. Our house is fairly new and the bathrooms are great but they’re mostly just functional and lack the character that I love. I crave change and enjoy projects so it got me thinking about ways I could spruce up my guest bathroom on a budget and also by myself. My husband isn’t really a fan of house projects so I only ask for help when I have no other choice and I’m happy to say the only help I had to get was a reminder of how to use the nail gun.. for safety reasons! 🙂
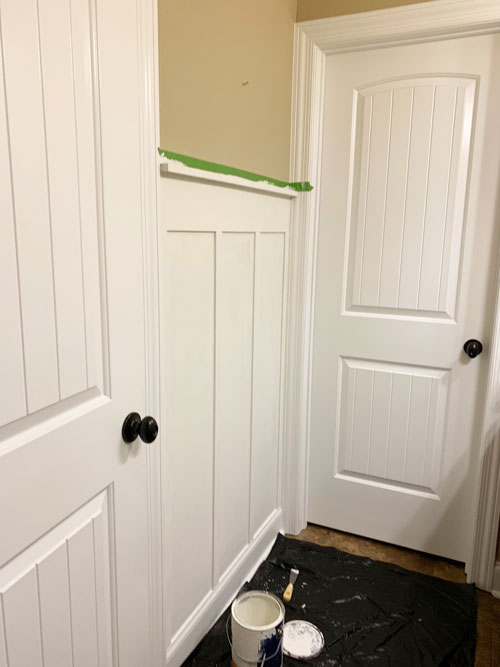
So first I started by adding some trim work to this really boring wall in the sink area of our guest bathroom. It seemed like the perfect spot to do something that made a big impact and since it was a small wall, I figured it was a great place to try adding trim for my first time!
This is the Lumber I used and it’s all from the Poplar Section at Lowes:
- Qty 1 – ¼ x 6 x 4 – top Large Piece
- Qty 1 – ¾ x 1-½ – 4 – top Ledge
- Qty 4 – ¼ x 2 x 4 – vertical boards
Total for all of this was around $35-ish
The vertical boards were the perfect height to use as is which meant I only had to cut down the two other pieces to fit the width of the wall. So two cuts on the miter saw and I had all the lumber I needed! If you don’t have a saw or don’t trust yourself with it, Lowes and Home Depot are happy to cut it down for you!
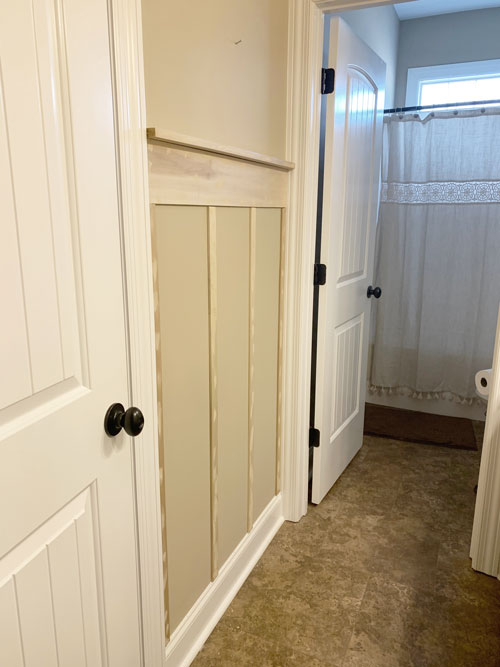
Then I just used some liquid nails on the back of my boards and then secured them in place with a nail gun. Nothing will make you feel more BA than using a nail gun! 😉
Once the trim is up just putty the nail holes and caulk. I never realized how important the caulking process is before I did the DIY shiplap wall in the nursery. I just assumed everyone was amazing at woodworking stuff but caulk hides all the gaps and imperfections and really gives it that finished look!
Then of course is paint. I just used the trim paint we had leftover from when we built.
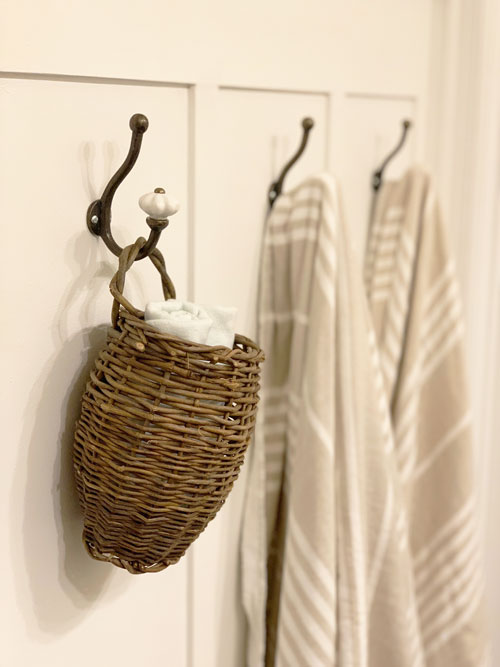
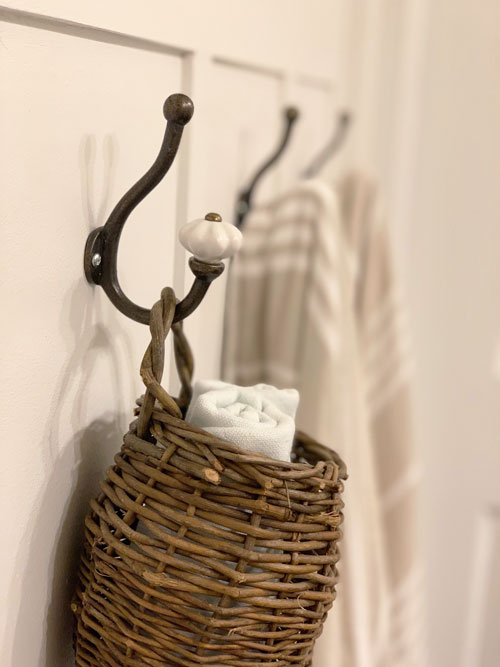
I picked up these cute hooks from Hobby Lobby one day when they were half off (of course) and loved the vibe of the oil rubbed bronze and then white ceramic looking ends. So for three of these was about $10.
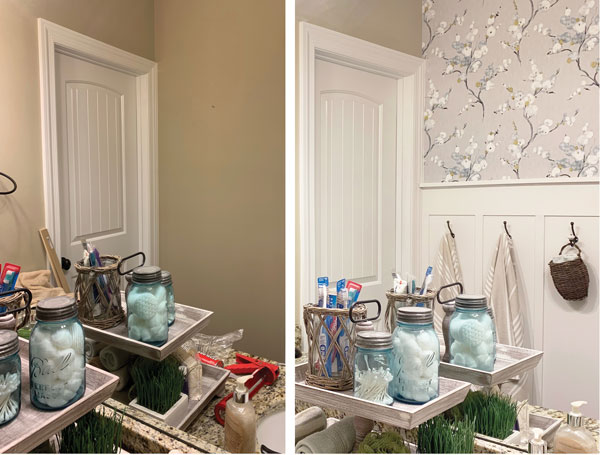
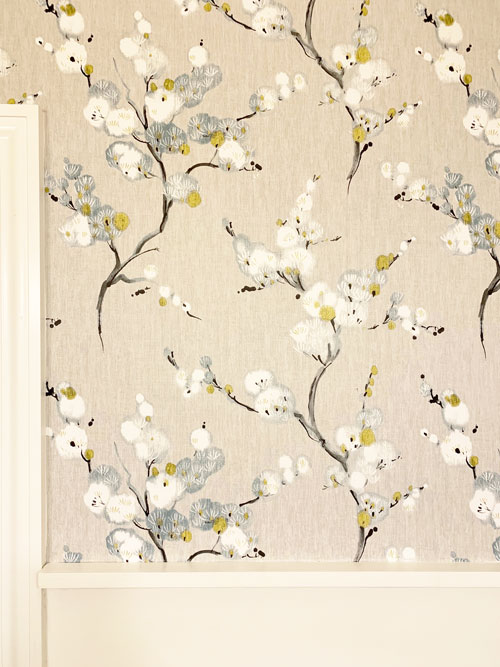
Originally I thought I would just find some vintage art or something to hang above the trim but I loved my peel and stick brick wallpaper so much that I figured this was the perfect place to do it again. If this was a bathroom that got used often and was very steamy, I wouldn’t recommend peel and stick wallpaper. But since this is our guest bathroom that even has a door that is closed off from the shower and Ellie uses our bathtub, I knew it would be fine in here for a few years at least.
So i went on the hunt for some unique peel and stick wallpaper and found THIS ONE and just fell in love. I never imagined this is what I would select but it just felt right for this space and it really is perfect! It works great with the warmer wall color and tiles but really cooled down the space and brightened it up as well. It also gave that wall the visual interest that I was hoping for. Luckily I only needed one roll because it was a little pricier than I had hoped at $43 per roll but I think it was worth the splurge!
So altogether this project was around $90 which was a little more than I had hoped due to the wallpaper but overall I love how it turned out! And now I find myself wanting to go use that bathroom more just because it’s pretty to look at! 😉
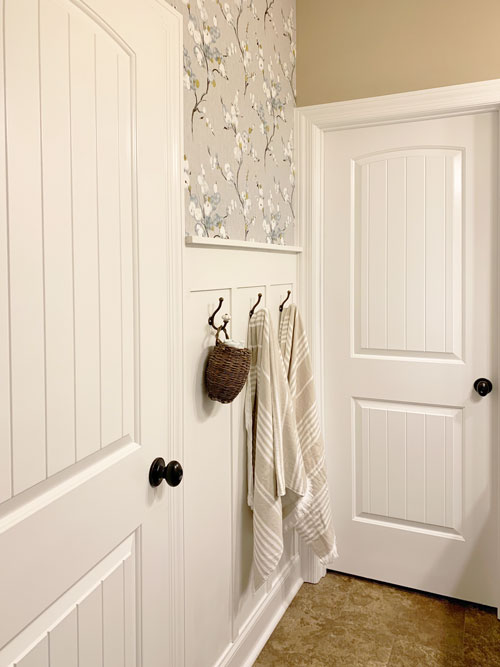
There are still a few things I’d like to do to complete the bathroom. I’m on the hunt for the perfect runner and maybe a simple piece of art to add over the trim and hooks.
And when I’m ready to tackle a larger project, I’d love to replace this large mirror with two framed mirrors and update the light fixtures but those are projects for another day… or year 😉