
DIY Wood Slice Pedestal and Mercury Glass Mason Jar Christmas Craft
This is a sponsored conversation written by me on behalf of Hobby Lobby. The opinions and text are all mine.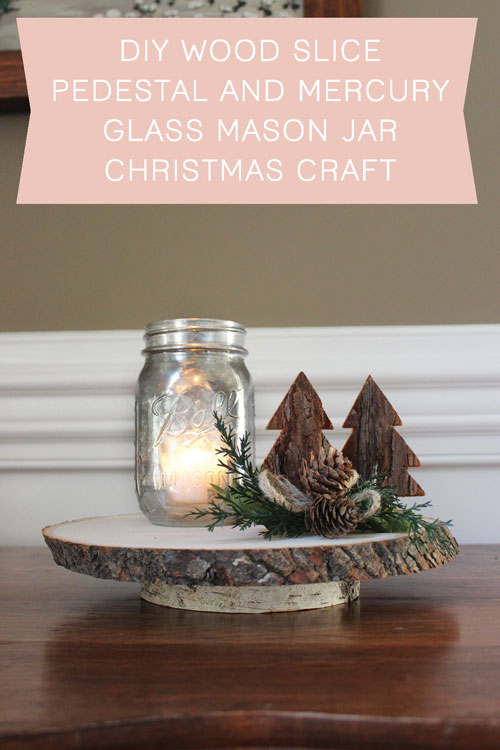
I love strolling down the aisles at Hobby Lobby looking for inspiration for DIY projects. When I was walking down the wood crafting aisle the other day I noticed their great selection of rustic wood slices. I have seen several wood slice pedestals stands at retailers and decided why not make my own?! I can do it for cheaper and can customize the height and size I want, I love the idea of making several of these at different heights and sizes to be use for a cute Christmas display or dessert table.
This has to be the simplest DIY thanks to the wood slice selection at Hobby Lobby. Just get a larger wood slice and smaller one and using any wood glue, glue them together and then weight down to dry. These would be perfect for a hot cocoa bar, desserts or any vignette. You will want to seal the wood if you plan to use these for food items but I chose not to do that for now since I’m planning to use this for decor only and loved the wood tone as is.
It’s even better when the wood crafts are on sale and you also use your 40% off coupon!
Here is how I made it!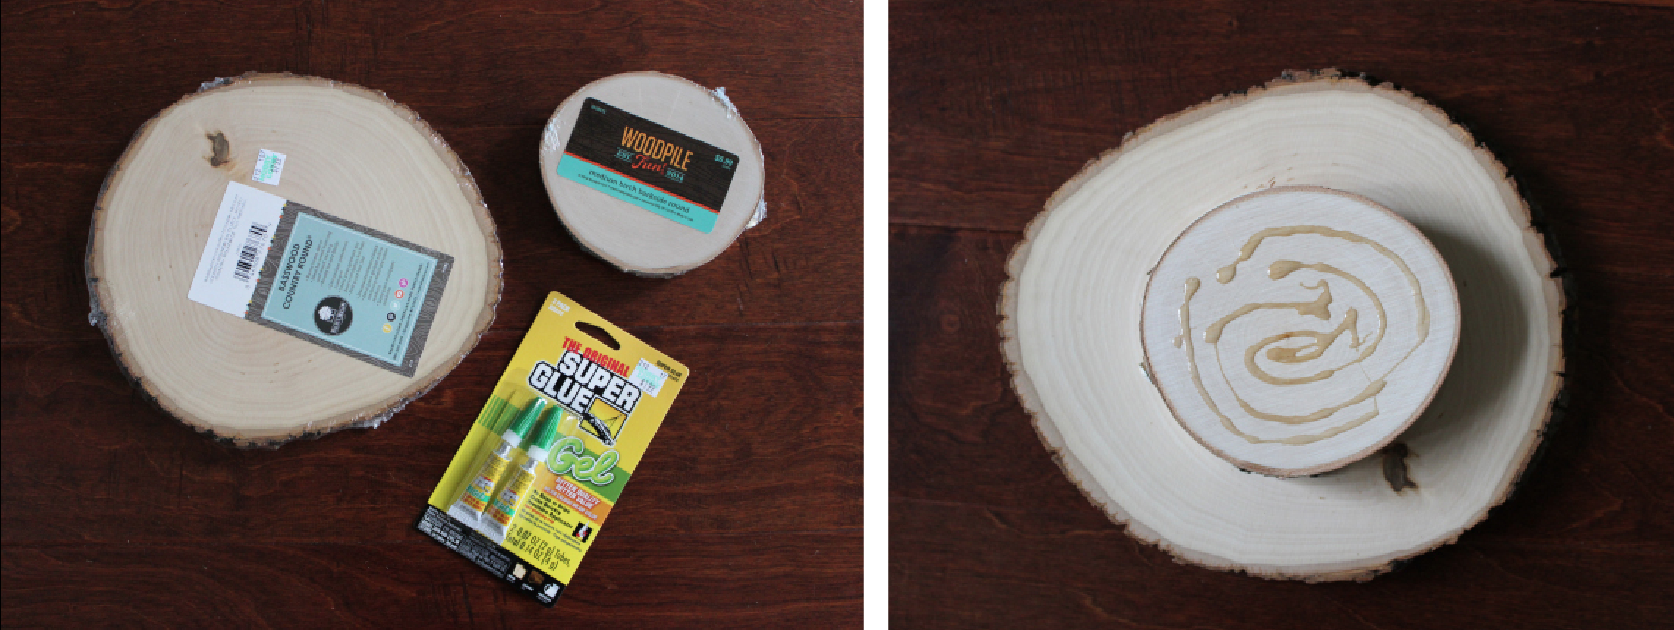
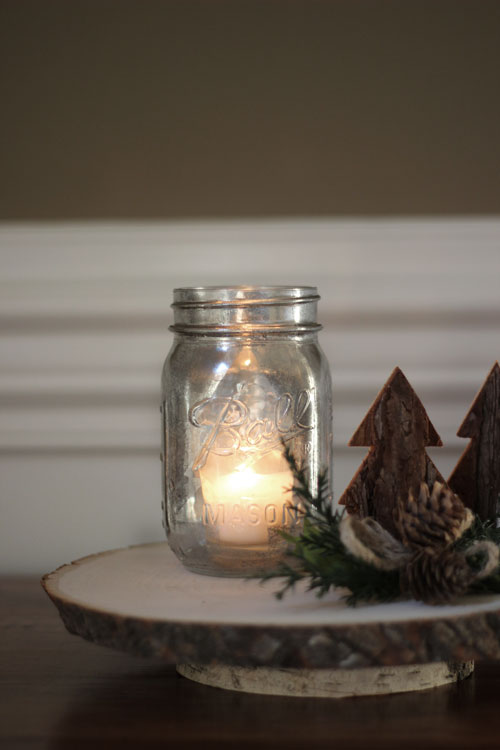
Every holiday calls for a good mason jar craft so I couldn’t let this one pass. Mercury Glass is the perfect hoiday finish for me, has a vintage look and there is something magical about how it looks lit up. If you don’t have a Cricuit or Silhoutte, like me, you can purchase stickers for this or cut out your own shape using painters tape and an exacto knife. I decided to stick with a basic tree shape but you could do whatever shape you want, your initial would even be cute! 
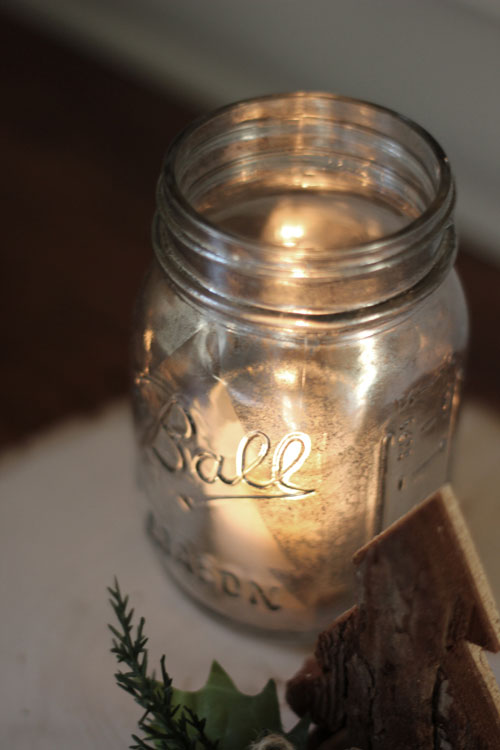
I’ve used a diy “mercury glass” technique before and it works great! You just need some Krylon Looking Glass Spray Paint, a spray bottle of vinegar and water and a paper towel.
First apply your sticker/shape to the mason jar and make sure the edges are all pressed firmly to the jar.
Then start by layering a mist of the vinegar and water solution and then a thin coat of the looking glass paint on top, then dab lightly with the paper towel. Repeat this over and over until you have the coverage you want. If you feel like the spray paint layer looks too thick, spray another layer of the water and vinegar and then dab a little harder (but make sure you don’t rub!).
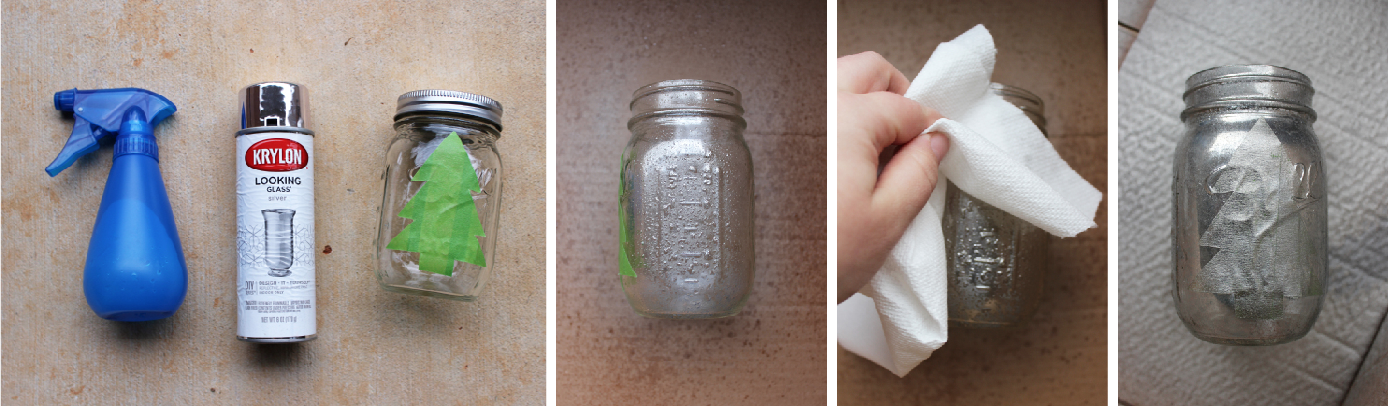
I did several layers of this technique to cover the entire jar. I also made sure it was pretty thick in the front to make sure the edge of the sticker had good coverage.
Once it is complete dry, carefully remove your sticker and voila! Put twinkle lights or a candle in there or use these to fill with goodies to gift to friends.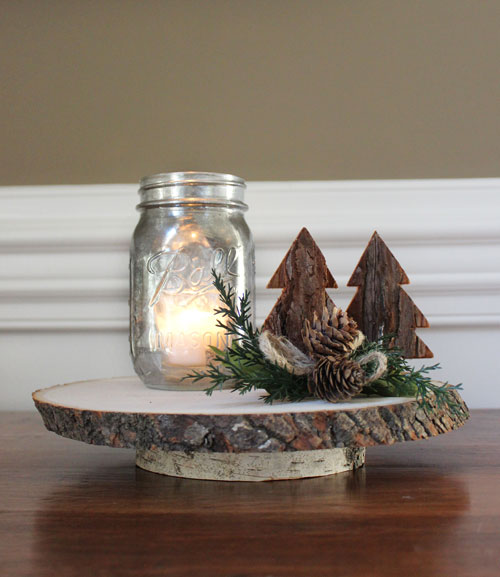
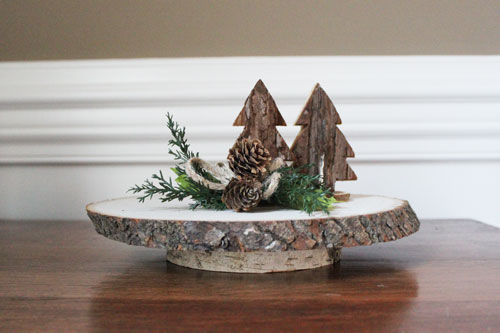
And aren’t these bark trees adorable?! They were in the wood craft section and came in a pack of 4 and I just added some small wood slices on the bottom to use in my Christmas vignettes. 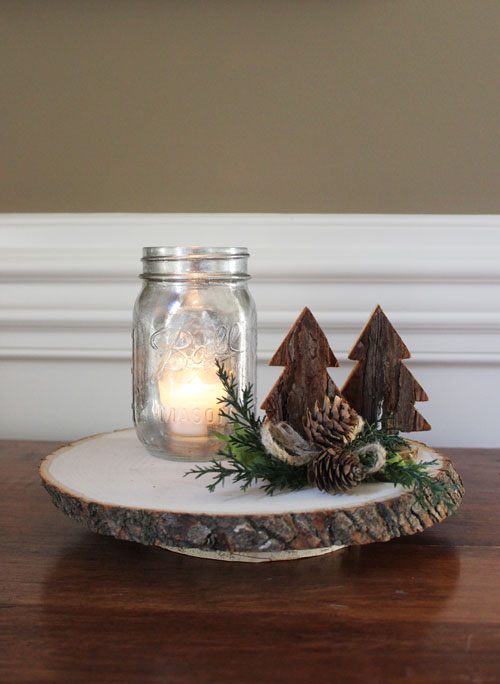
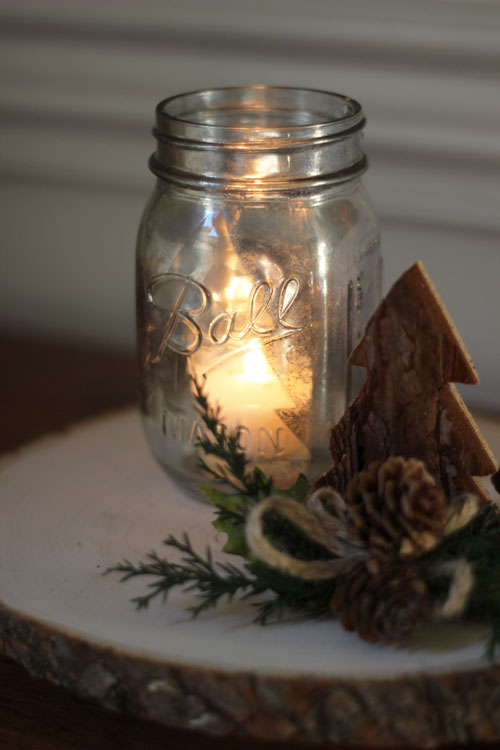
And look how magical the mercury glass technique looks lit up as it was getting dark! You could do this technique to several jars to use together with different designs and different size jars!
Now I can’t wait to bust out all of my Christmas decor! The house is always so cozy and romantic during Christmas time!
This is a sponsored conversation written by me on behalf of Hobby Lobby. The opinions and text are all mine.