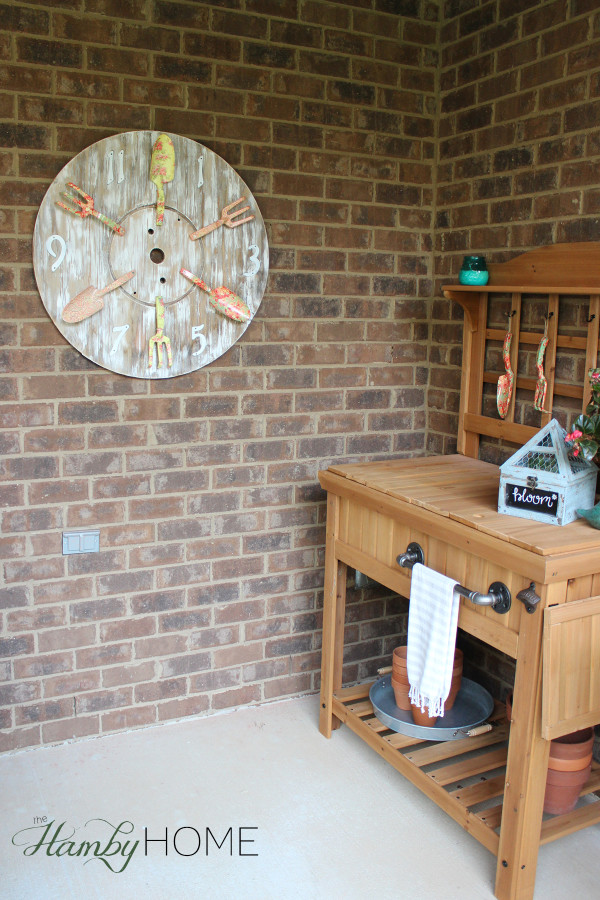
DIY Garden Tool Spool Clock
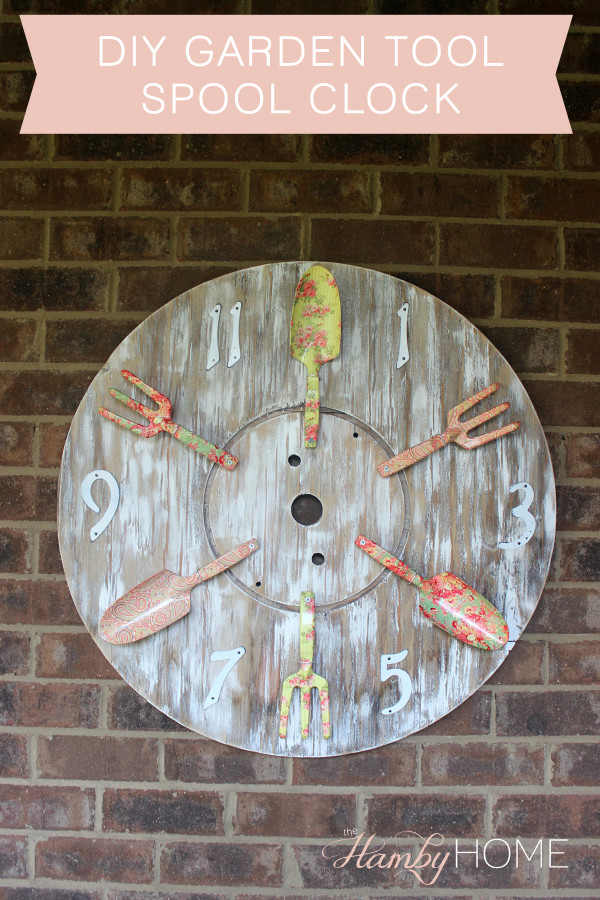
This project has been an evolving one. I found these adorable floral potting tools at Michael’s for 50% off and fell in love with them. I bought a couple for my potting bench which then made me want even more and of the other patterns. I have had the end of a wooden spool waiting to be used for a couple years and knew that was exactly what I needed to make an outdoor faux clock. I remember a couple years ago seeing mysweetsavannah make a rustic outdoor clock out of old potting tools and I have kept that idea tucked away until now. After lots of great advice from my IG friends, I decided to use 6 tools and the rest use mailbox numbers and I love how it turned out so I figured I would show you how I made it!
Supplies Needed: Most of this I already had around the house…I try to be resourceful with DIY to keep the cost down!
Supplies:
- Cable Spool End – FREE
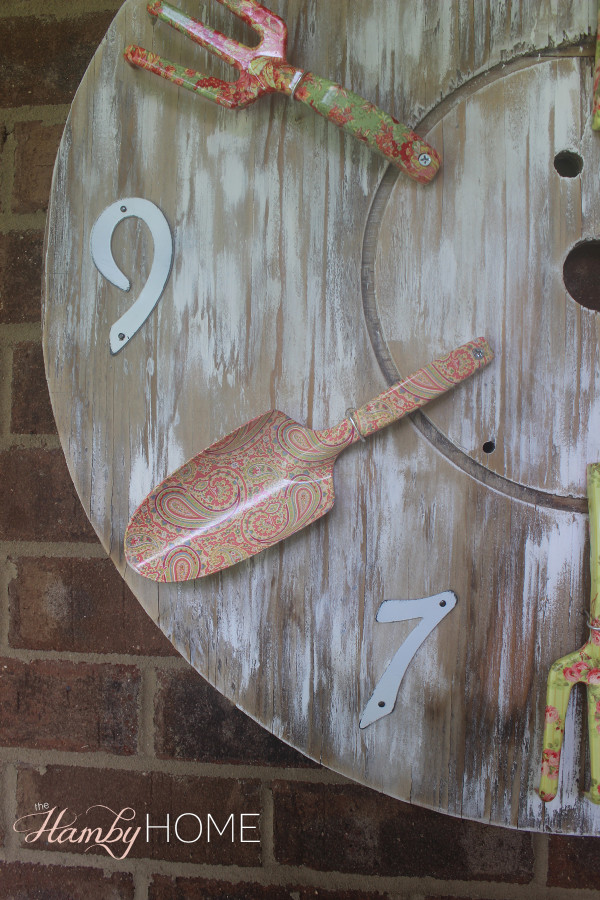
- 6 potting utensils – would be very cute with old rustic tools – $2.50/pc
- 6 mailbox numbers – the cheapest you can find – $1.50/pc
- White Spray Paint – already had
- Silver Wire (can be found with floral supplies) – already had
- White Paint and Brush – already had
- Hanging Hardware
Tools:
- Wire Cutters
- Buffing Block/Sand Paper
- Sander
- Screws
- Hammer
- Pliers (optional)
Here is how I made it:
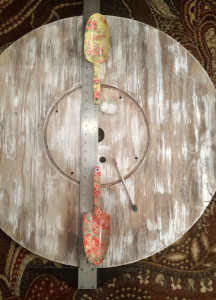
Step 1: First I sanded the wooden spool down really good trying to get it as smooth as possible. It is old and dried and broken in places so I just did the best I could. The flaws just add character, right?
Step 2: I wanted a white washed look to the spool so I used white paint and did a dry brush technique. I am terrible at white washing for some reason so I always stick with dry brushing, so much easier for me! Once the paint was dry, I quickly sanded it again to smooth out the paint.

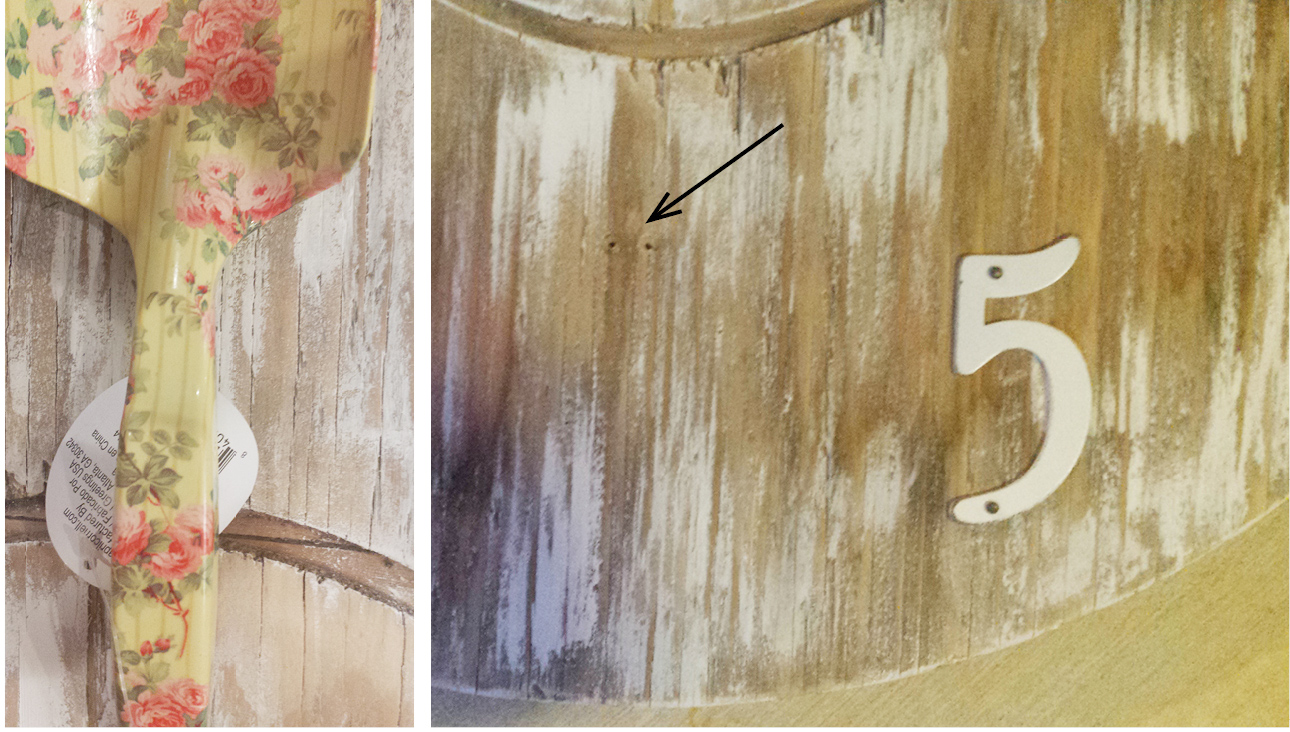
Step 3: Spray paint the numbers. When they are dry, buff the edges to distress them a little. I used a buffing block but you can use sandpaper or whatever you have around, it comes off the metal numbers easily.

Step 4: I started out trying to mark all 12 places but it ended up being easier to just mark the top, bottom, left and right and just “eyeball” the rest of it.
Step 5: Once I got everything in place, I hammered the numbers to their spot. I decided not to spray paint the nails that came with the numbers and just left them black for more character.

Step 6: Drill small holes on either side of the tool handle. Mine had a little notch in the handle that was great for the wire placement. Keep in mind that the placement will be different if you use different tools, my placement was different for shovels than it was for the rakes.
Step 7: Insert about 6 inches of wire and pull tight underneath (I used pliers to pull through tightly and twist to secure). Just twist and press the ends flat up against the back of the spool.
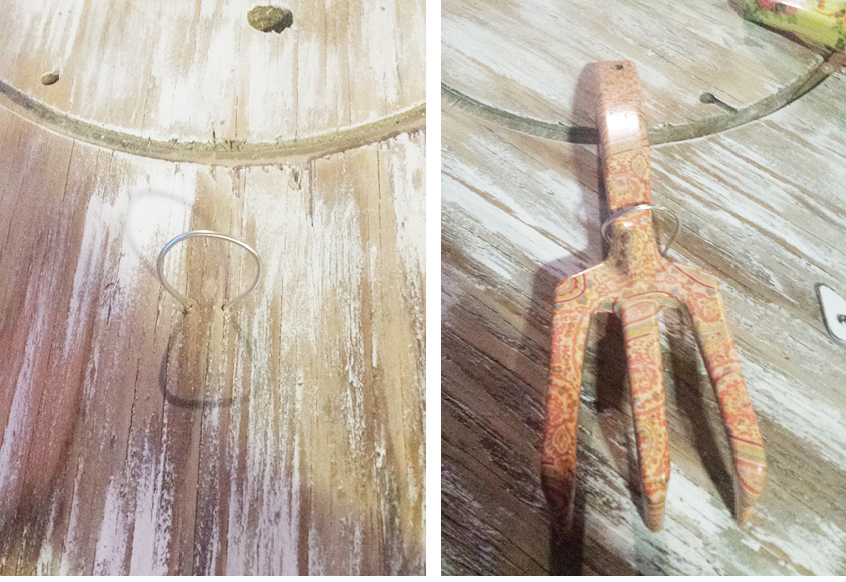
Step 8. Using screws, screw through the hold in the bottom of the handle and into the spool to secure.
I added two sawtooth hangers on the back and used a drill bit specifically for brick to drill screws to hang it by on the patio! I just love the way it turned out and how unique of a wall piece it is. It’s a little more expensive than my typical DIY project but I think it was totally worth it, don’t you?