
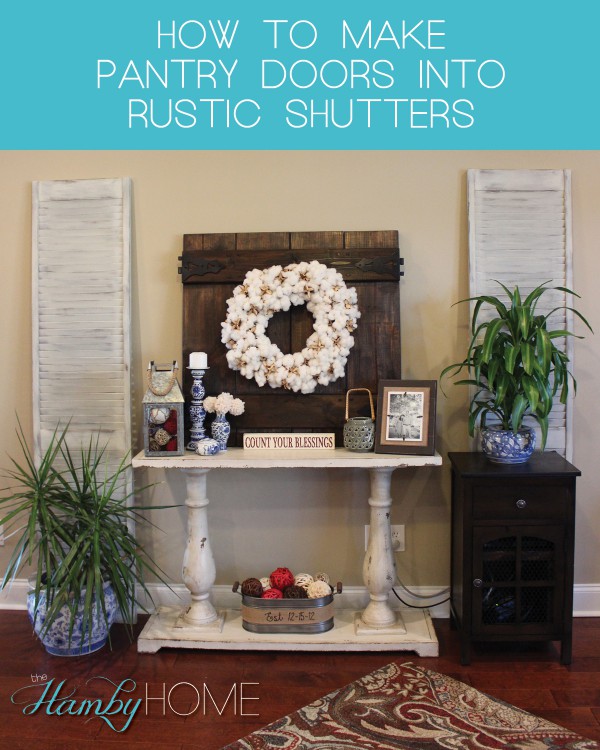
How To Make Pantry Doors Into Rustic Shutters
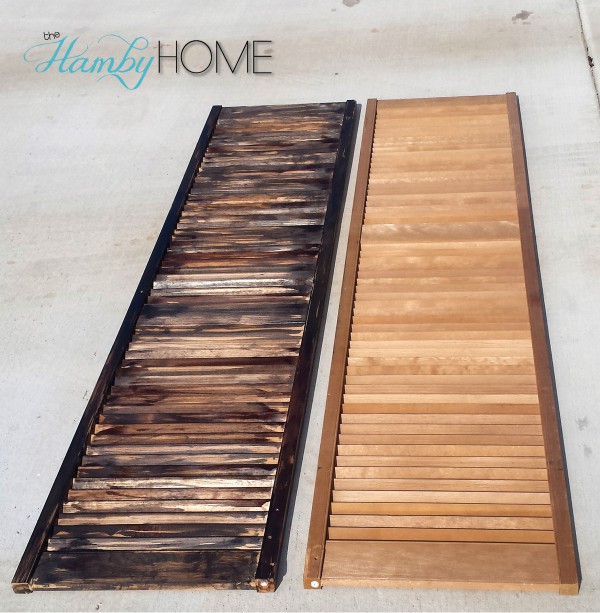
I’ve mentioned before that I am constant looking for good junk on the side of the road when I’m out driving around town. I have to admit that the road I work on has been an awesome source of trash finds! I’ve gotten wooden spools, cabinet doors and one day found what I thought was shutters but ended up being this folding pantry door that was a little busted at the bottom. I always ask the company first but typically if they’re out by the dumpster, they are fair game!
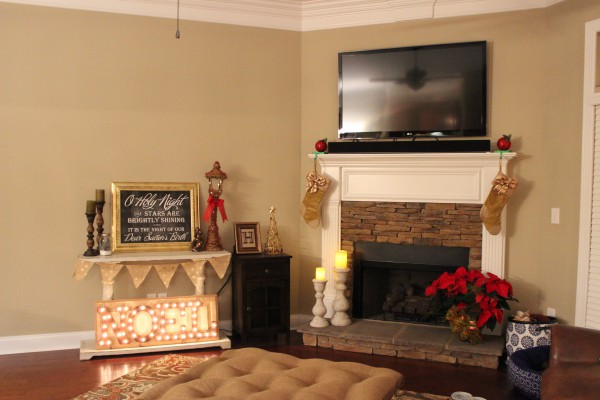
When I picked up this folding pantry door last April, I really had no idea what I was going to do with it or where I was going to use it but knew it had potential. I’ve been in the process of decorating the new house but I’m struggling because all of the walls are so much larger and the ceilings are much higher than our old house so everything I have appears so much smaller! You can kind of see what I mean in this picture from Christmas.
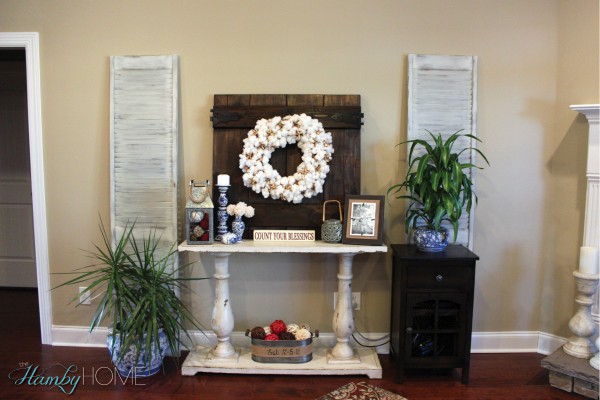
I was brainstorming and got the idea to separate the pantry doors and use them as shutters on each side of our console table. I actually liked the unfinished wood look they already had but decided to go ahead and try to make them look old and rustic to match the table and brighten up that wall.
Supplies Needed:
- Wooden Pantry Doors or Shutters (Roadside find – FREE)
- Stain (use whatever you already have)
- Paint Brushes
- Paint (picked up a mis-tint at Lowes for $4 thinking I may need more paint than I did but hindsight could have used something I already had. The Lowes sample size would be plenty!)
There are SO many techniques use to make shutters and other items look old and weathered but here is how I did mine.
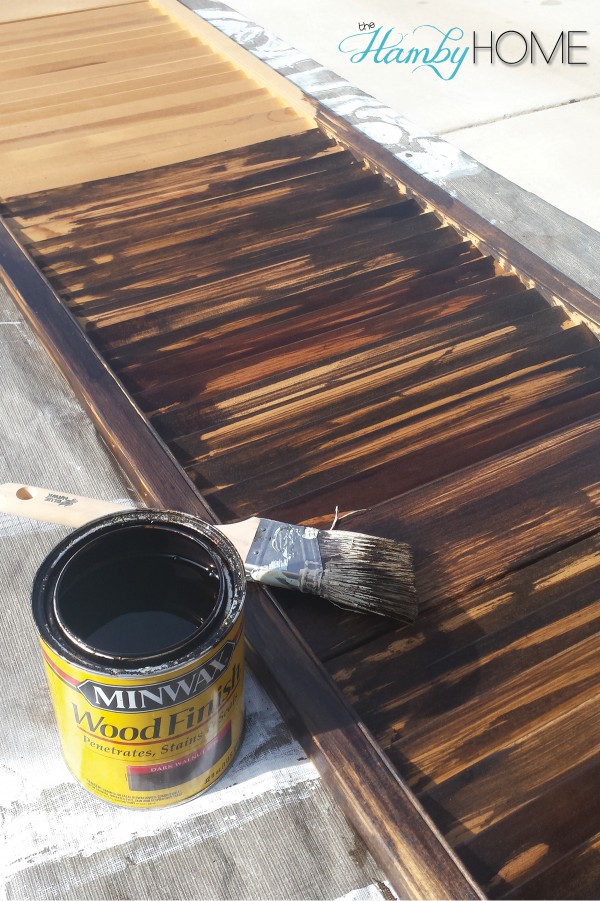
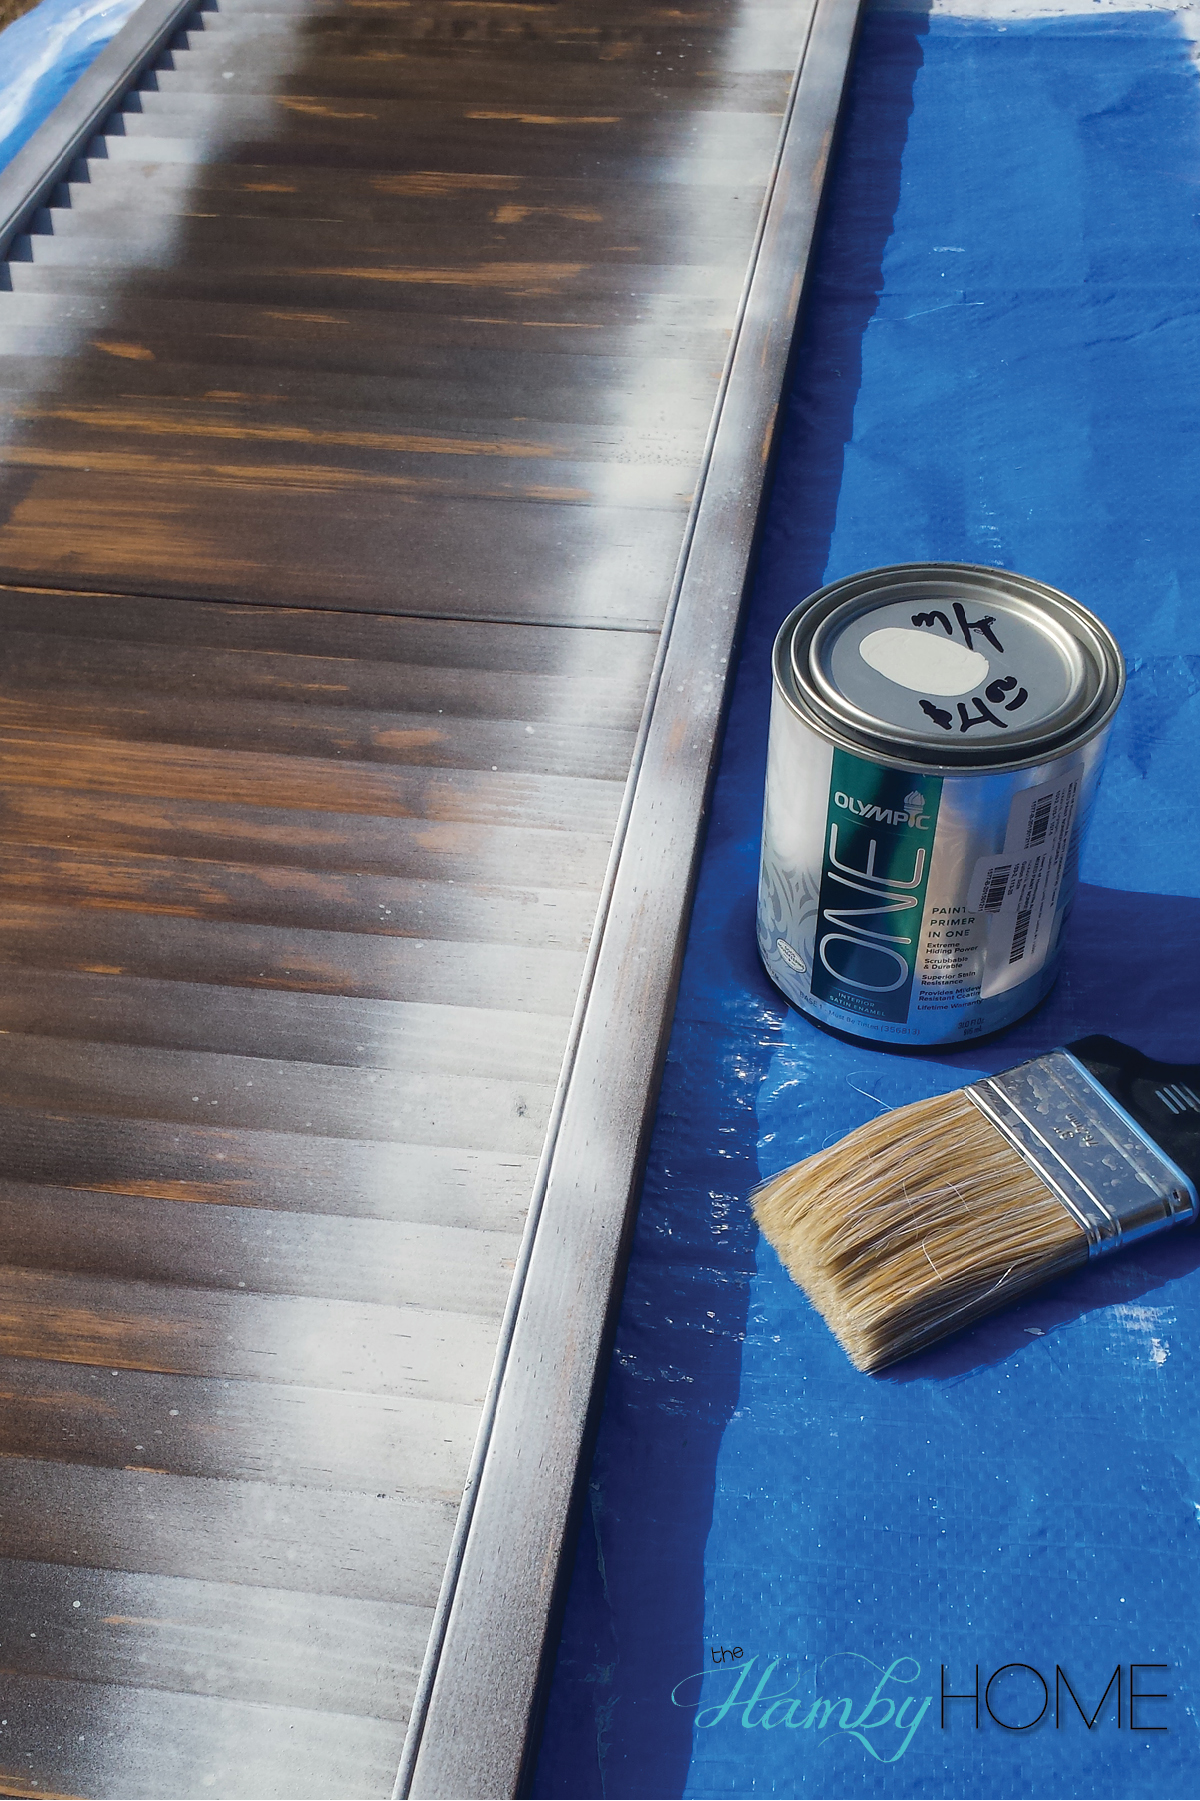
Step 1: Roughly Stain Them.
Have you ever not washed a brush soon enough and it gets a little hard and rough and you think its not worth keeping? Well DO! That’s what I used for this and it worked perfectly!! Obviously a good paint brush will work as well. I already had some Dark Walnut stain and so I just used it and rough stained the shutter with no rhyme or reason. I just wanted to give the wood different variations that will peak through underneath the paint that will go on top. Let this fully dry.
Step 2: Spray paint the inside edges of the “shutter” panes
My friend Jennifer from Repurposed Vintage Design gave me the tip to use spray paint to get the edges of the shutter so I quickly sprayed the inside edges and didn’t worry about full coverage or missing a spot. This made my life so much easier and I’m so thankful I didn’t skip this step!
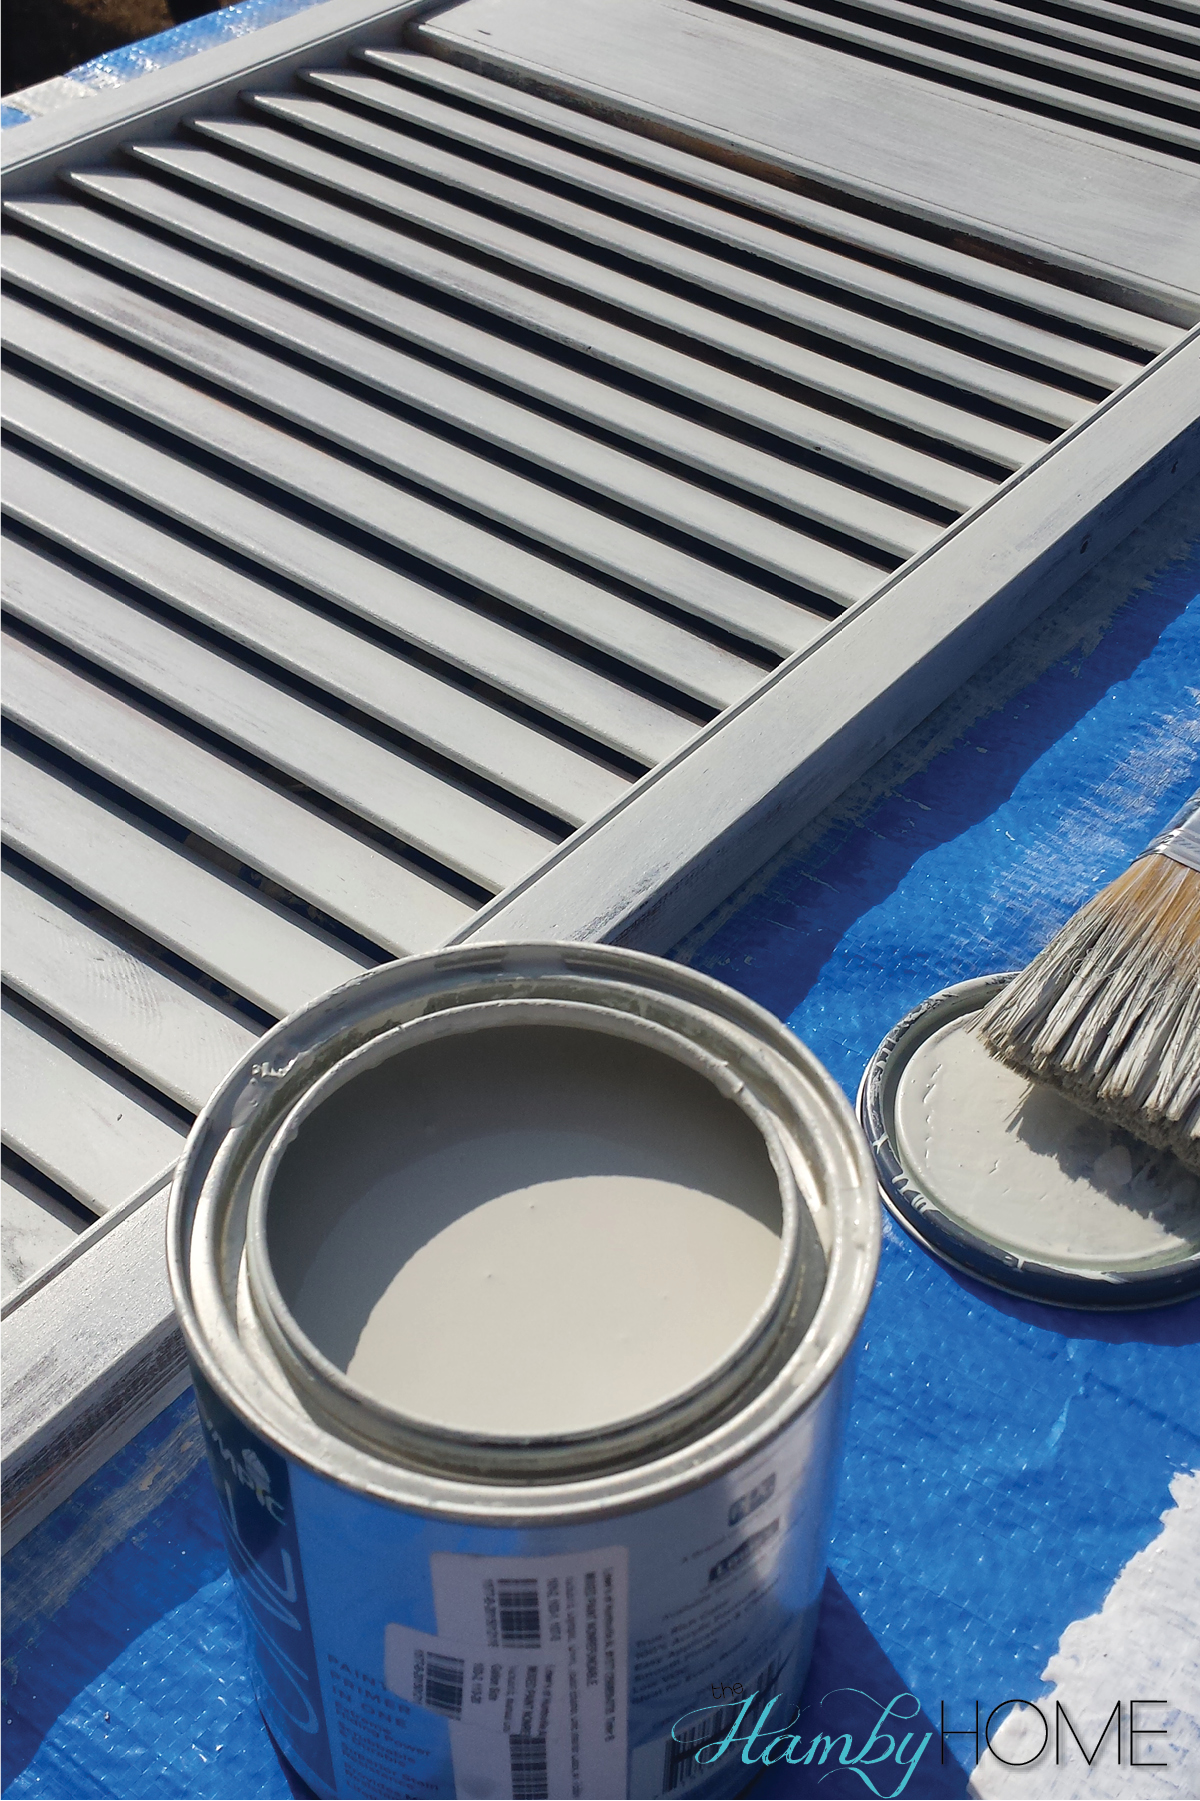
Step 3: Paint the Doors
I used what I would call a “dry brush” technique. Using a good paint brush (not a stiff one like I used above) I applied just the tip of my brush into the paint and brushed along the direction of the shutter panes. I focused on each pane at a time for the most part. Some panes had fuller coverage and some less but that’s what made this so great. I knew I was going to distress it so I let the paint brush naturally give it that weathered look.

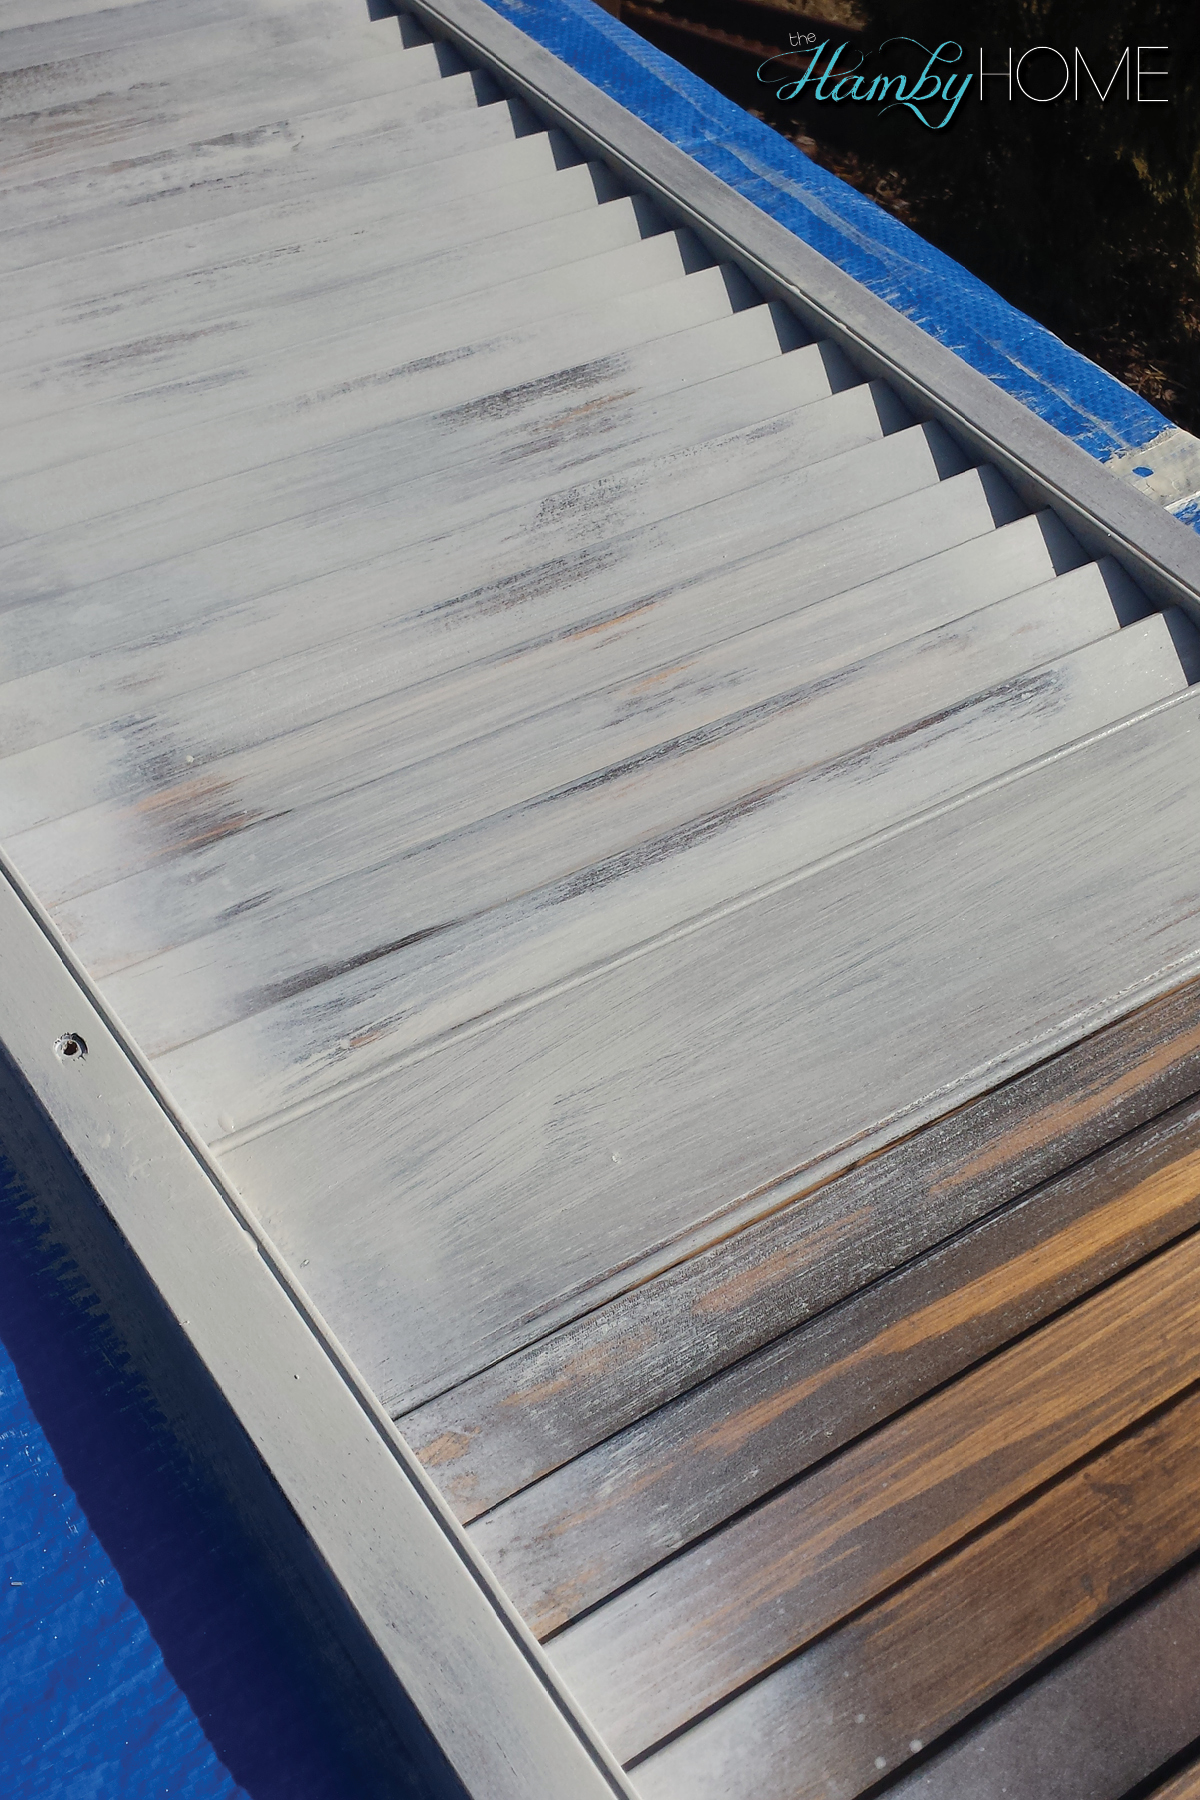
This picture shows you how little paint I used. This is what was left after painting both shutters.
Step 4: Distress the Edges
Because I had used such a small amount of paint and did this outside in the sun, I was able to go ahead and distress the first door after I finished painting the second. You may need more drying time before doing this step. I already had a good rough paint job on the shutter so it didn’t require too much distressing. I used steel wool but you could use a sanding block or palm sander or whatever distressing tool you prefer. I just roughly rubbed down most of the outside edges and the edges on the pane. Keeping it random and on the places it would naturally age/distress.
That is it! These worked perfectly for this space and added the perfect wall filler for the total cost of $4 (paint only – which like I said, I could have used something I had already).

And here is your daily dose of my Mason, who thinks he needs to be in EVERY picture!
I had some people ask so I figured I’d provide the sources for all of the items shown.
- Barn Door – DIY Posted Here
- Cotton Wreath – DIY Posted Here.
- Console Table – Wayfair
- Brown side table – Home Goods. This is where we are hiding the cable box, dvd player, cords, etc. – seriously..this little guy will save marriages 😉
- All blue and white ceramics were thrift store/garage sale finds
- Galvanized Lantern – Target
- Galvanized Bucket below – Home Goods
- Decorative Balls – Kirklands
- Green Ceramic candle holder – Target
- Frame – Local Florist/Gift Shop
- Count Your Blessing Sign – Kirklands