DIY Old Shutter Decor
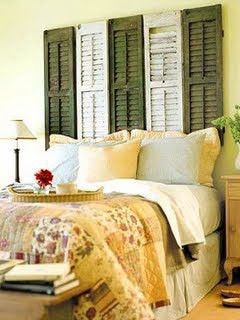
We did not have a headboard for our guest bedroom so when I ran across this picture on pinterest I thought it was the perfect solution! Not only do I enjoy projects like this but I would make something that would normally need a piece of furniture that would cost more than the shutters. I began the hunt for old shutters! Like I’ve mentioned on my blog before, these weathered windows, doors and shutters that people restore are fabulous but hard to come by for cheap!!
I went to the Habitat for Humanity Restore in Huntsville and found two different sets of vinyl shutters that were still in boxes. I figured it didn’t matter that they were different colors since I was going to paint them. I started out by painting them a cream color as a primer. I used spray paint to speed up the process, especially since this was just the base coat. I apologize for not photographing that stage of the process, I did this project before I started my blog!
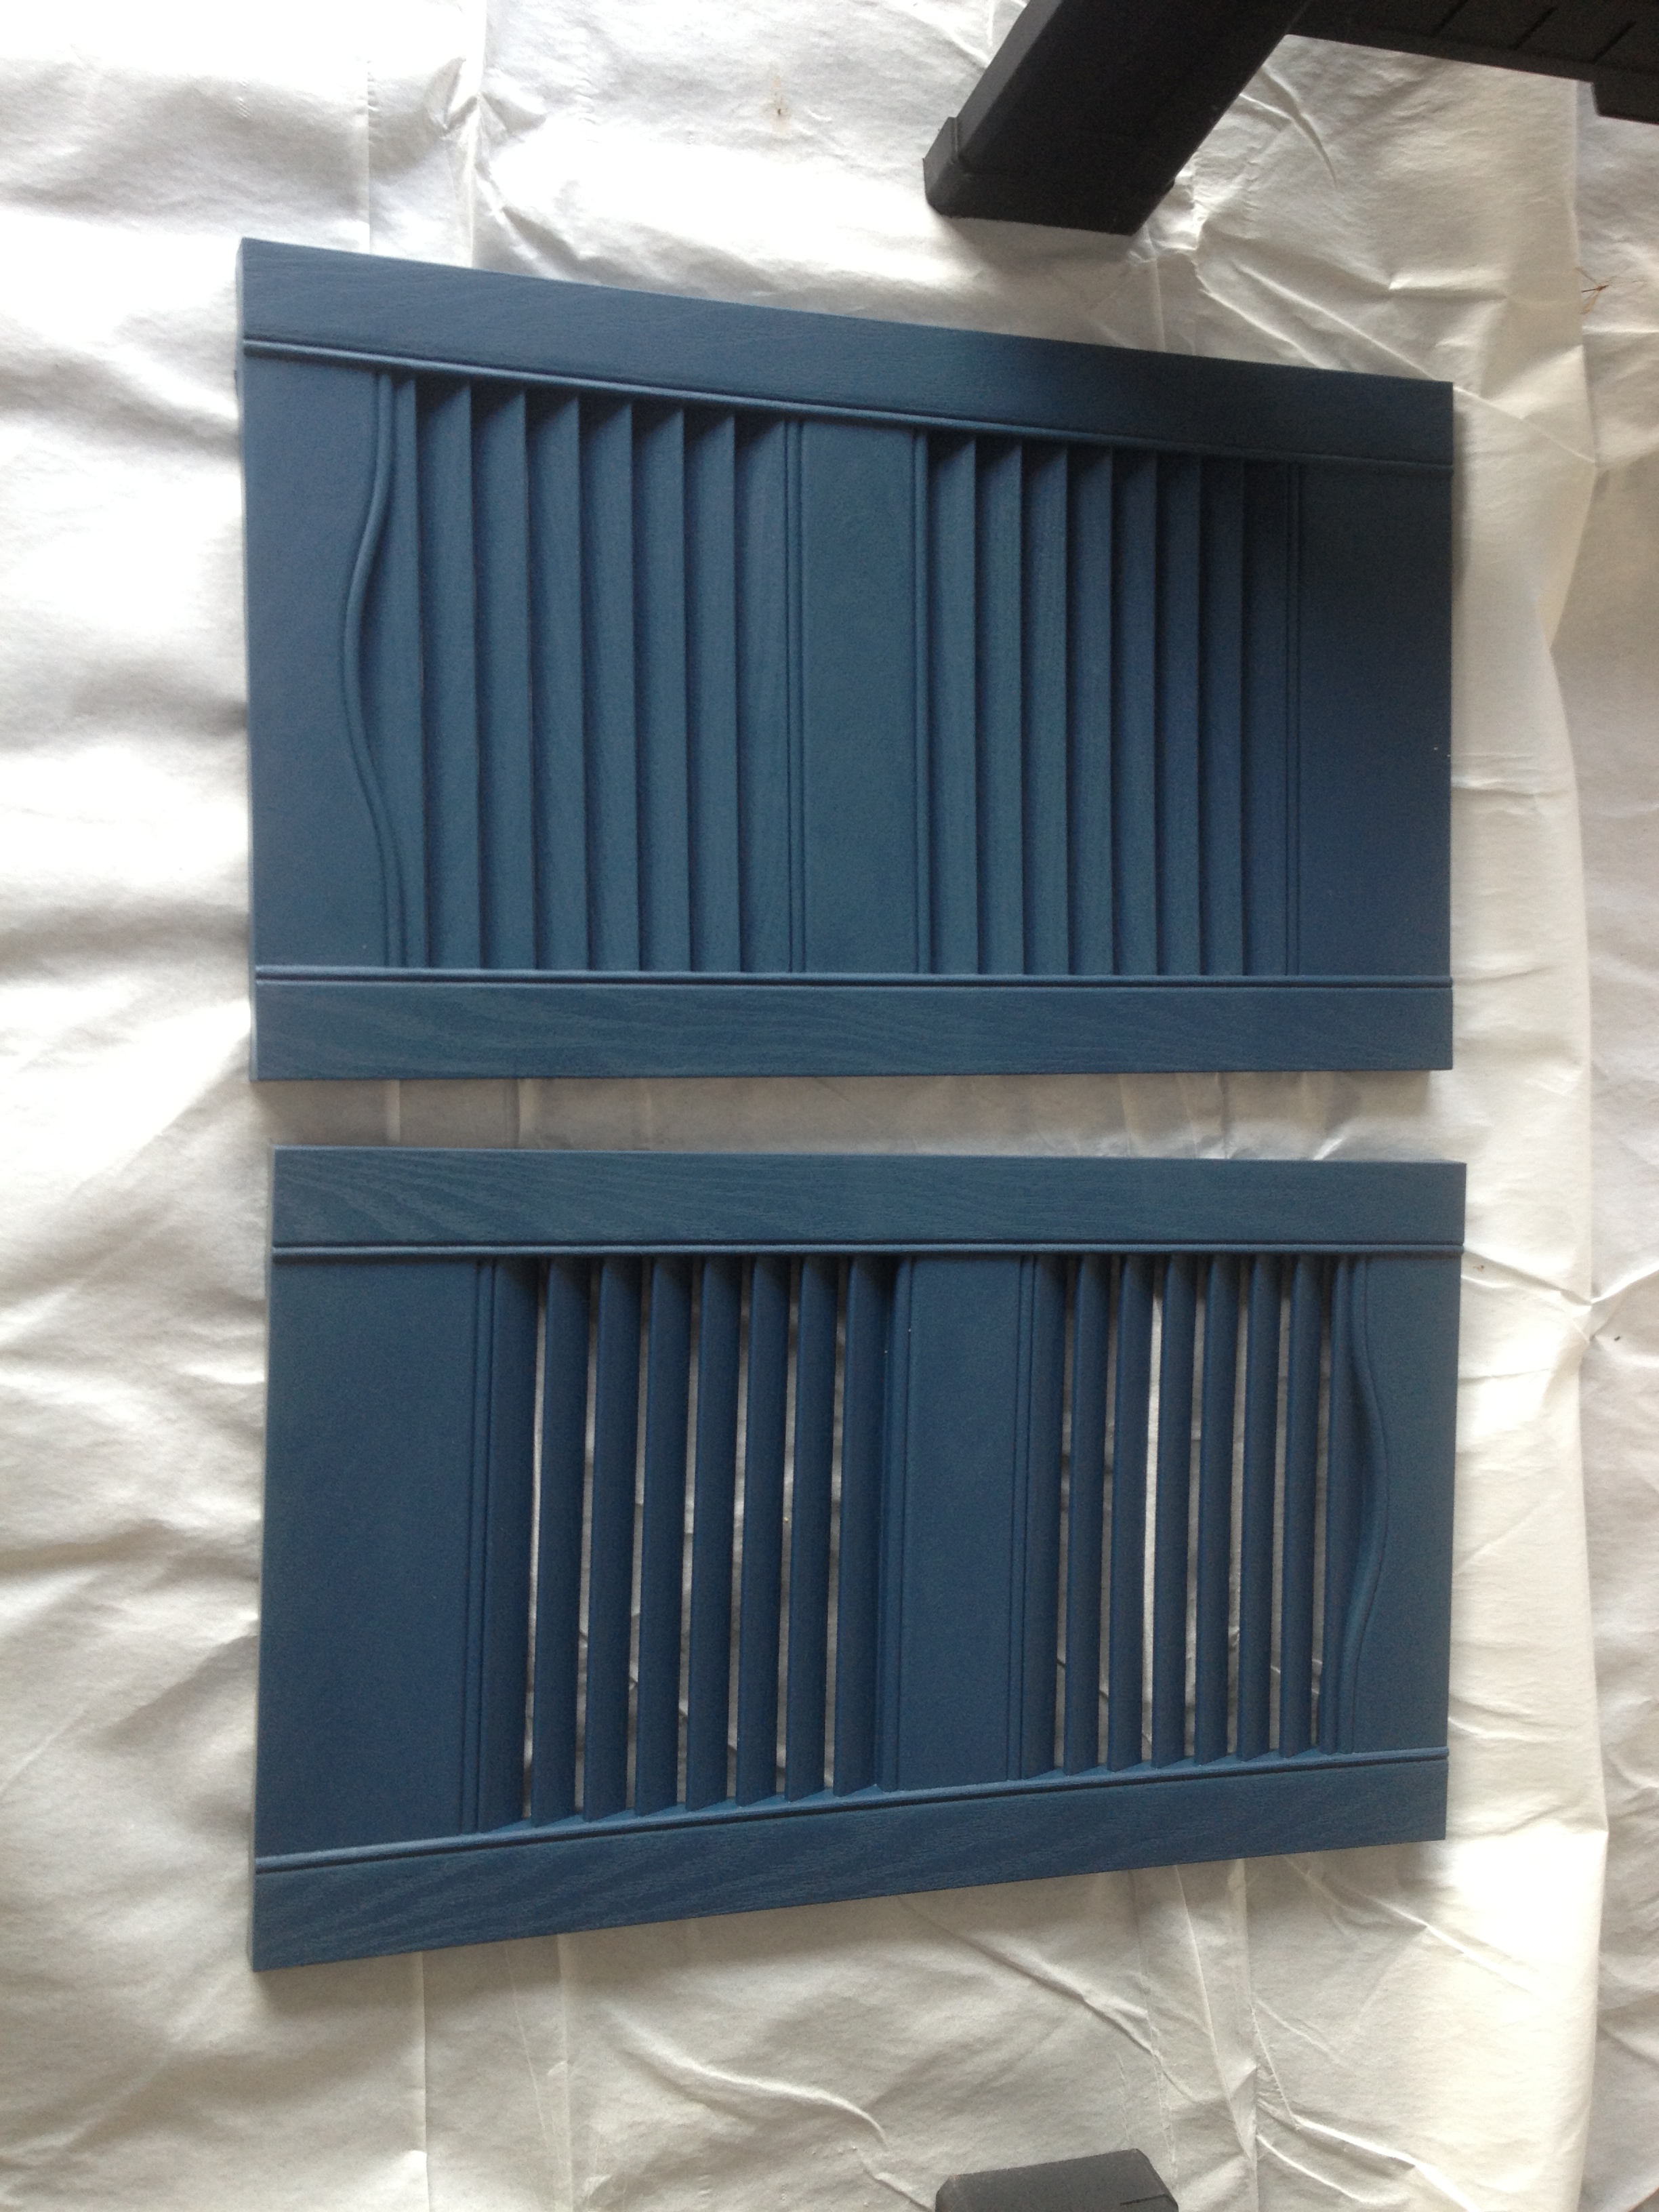
Once they were primed, I painted them with Folk Art Crackle Medium that I purchased from Hobby Lobby. I read several tips on crackle paint and read that the thicker you paint on the crackle medium, the deeper the cracks will be. I was very generous with the amount of crackle medium I used because I wanted a very distressed look for these “wannabe” old shutters. You have to let this crackle paint dry completely so I just waited until another day to paint the last coat. I picked out two different colors for the shutter like the inspiration picture above. I just purchased the small 8oz. sample paint from Lowes because I didn’t need much and $2.98 sounded like a good price to me! I painted two of each color roughly and watched the magic happen! The crackle medium really is an amazing thing!
Tips for the last coat: Only paint over a certain area one time, if you paint over it twice, you may mess up the crackle magic. I painted quickly without worrying about covering every corner. I think it added to the crackle/antique look.
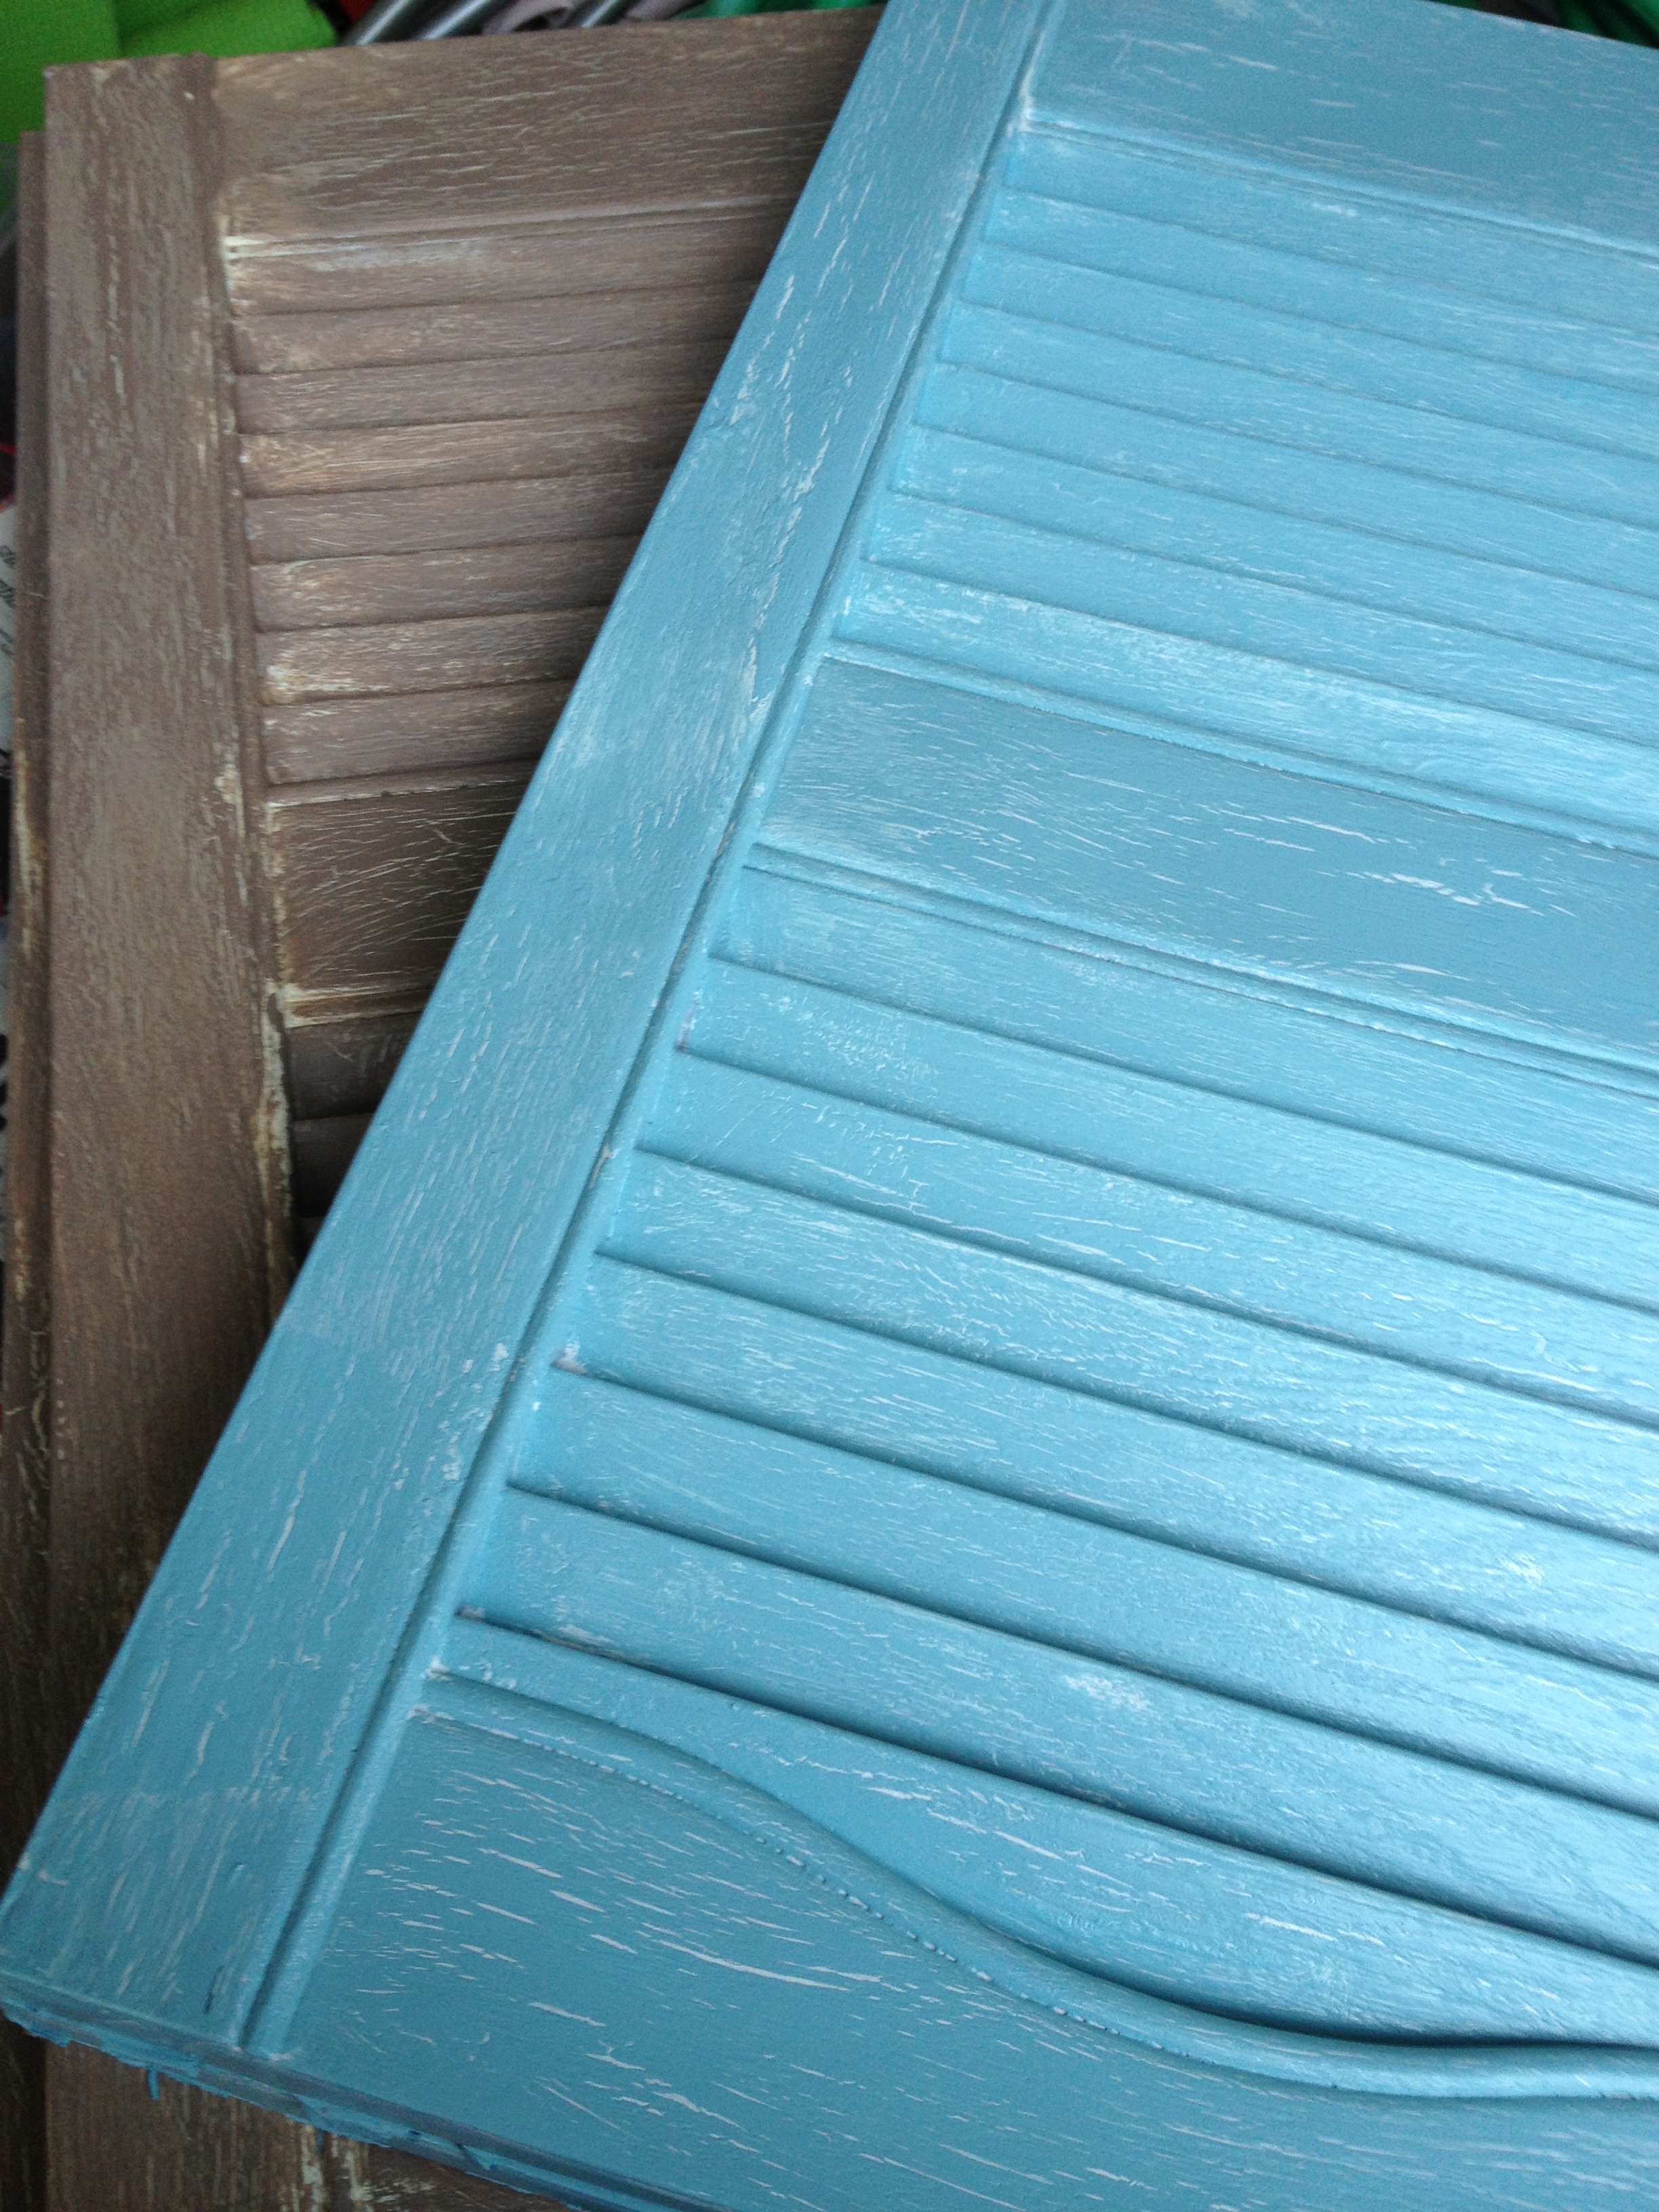
I wanted them to look a little rougher than just the crackle but I learned the hard way that vinyl does not work like wood does! This paint does not stay particularly well on the vinyl and sand paper will completely remove all the paint you added (primer and all). Hindsight, I would have waited until I found wooden shutters because I’ve notice the paint will peel off very easily if bumped and I would have been able to sand and distress them more if they had been wood.
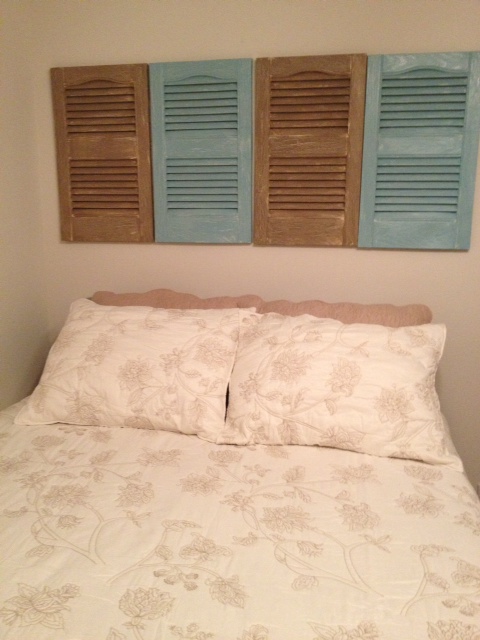
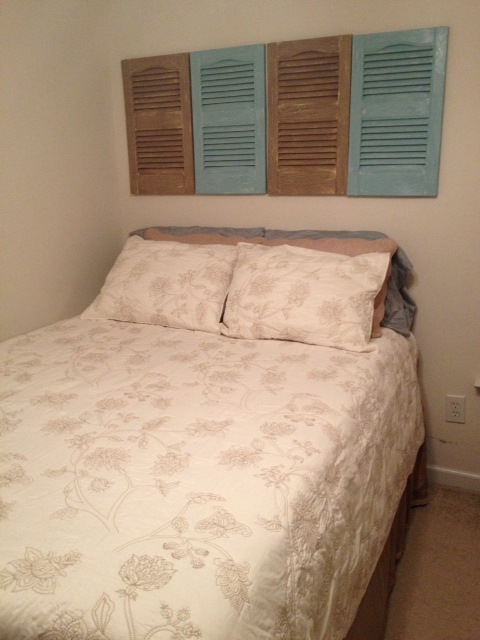
Here is the headboard replacement…not bad for a quick project! This project cost me about $30. $20 for the four shutters and $10 for the paint and spray paint I used to prime them and still have over half of the paint left over for upcoming projects!
I picked up a wooden headboard off the side of the road yesterday that I have big plans for but the good news is I am sure I can find somewhere else to use these “wannabe antique shutters” 🙂